Quantcast
Channel: ASP.NET Hacker
Viewing all 759 articles
Browse latest View live

Error while starting Docker for Windows

$
0
0

The last couple of months I wanted to play around with Docker for Windows. It worked just twice. Once at the first try for just one or two weeks. Then I got an error, when Docker tries to initialize right after Windows starts. After I reinstalled Docker for Windows it runs the second time for a two or three weeks. I tried to reinstall all that stuff but I didn't get it running again on my machine.

The error shown on this dialog is not really meaningful:

Object reference not set to an instance of an object...

Even the log didn't really help:

Version: 17.03.1-ce-win5 (10743)
Channel: stable
Sha1: b18e2a50ccf296bcd637b330c0ca9faaab9d790c
Started on: 2017/04/28 21:49:37.965
Resources: C:\Program Files\Docker\Docker\Resources
OS: Windows 10 Pro
Edition: Professional
Id: 1607
Build: 14393
BuildLabName: 14393.1066.amd64fre.rs1_release_sec.170327-1835
File: C:\Users\Juergen\AppData\Local\Docker\log.txt
CommandLine: "Docker for Windows.exe"
You can send feedback, including this log file, at https://github.com/docker/for-win/issues
[21:49:38.182][GUI            ][Info   ] Starting...
[21:49:38.669][GUI            ][Error  ] Object reference not set to an instance of an object.
[21:49:45.081][ErrorReportWindow][Info   ] Open logs

Today I found some time to search for a solution and fortunately I'm not the only one who faced this error. I found an issue on GitHub which described exactly this behavior: https://github.com/docker/for-win/issues/464#issuecomment-277700901

The solution is to delete all the files inside of that folder:

C:\Users\<UserName>\AppData\Roaming\Docker\

Now I just needed to restart docket for Windows, by calling the Docker for Windows.exe in C:\Program Files\Docker\Docker\

Finally I can continue playing around with Docker :)


How to add custom logging in ASP.NET Core

$
0
0

ASP.NET Core is pretty flexible, customizable and extendable. You are able to change almost everything. Even the logging. If you don't like the built-in logging, you are able to plug in your own logger or an existing logger like log4net, NLog, Elmah. In this post I'm going to show you how to add a custom logger.

The logger I show you, just writes out to the console, but just for one single log level. The feature is to configure different font colors per LogLevel. So this logger is called ColoredConsoleLogger.

General

To add a custom logger, you need to add an ILoggerProvider to the ILoggerFactory, that is provided in the method Configure in the Startup.cs:

loggerFactory.AddProvider(new CustomLoggerProvider(new CustomLoggerConfiguration()));

The ILoggerProvider creates one or more ILogger which are used by the framework to log the information.

The Configuration

The idea is, to create different colored console entries per log level and event ID. To configure this we need a configuration type like this:

public class ColoredConsoleLoggerConfiguration
{
  public LogLevel LogLevel { get; set; } = LogLevel.Warning;
  public int EventId { get; set; } = 0;
  public ConsoleColor Color { get; set; } = ConsoleColor.Yellow;
}

This sets the default level to Warning and the color to Yellow. If the EventId is set to 0, we will log all events.

The Logger

The logger gets a name and the configuration passed in via the constructor. The name is the category name, which usually is the logging source, eg. the type where the logger is created in:

public class ColoredConsoleLogger : ILogger
{
  private readonly string _name;
  private readonly ColoredConsoleLoggerConfiguration _config;

  public ColoredConsoleLogger(string name, ColoredConsoleLoggerConfiguration config)
  {
    _name = name;
    _config = config;
  }

  public IDisposable BeginScope<TState>(TState state)
  {
    return null;
  }

  public bool IsEnabled(LogLevel logLevel)
  {
    return logLevel == _config.LogLevel;
  }

  public void Log<TState>(LogLevel logLevel, EventId eventId, TState state, Exception exception, Func<TState, Exception, string> formatter)
  {
    if (!IsEnabled(logLevel))
    {
      return;
    }

    if (_config.EventId == 0 || _config.EventId == eventId.Id)
    {
      var color = Console.ForegroundColor;
      Console.ForegroundColor = _config.Color;
      Console.WriteLine($"{logLevel.ToString()} - {eventId.Id} - {_name} - {formatter(state, exception)}");
      Console.ForegroundColor = color;
    }
  }
}

We are going to create a logger instance per category name with the provider.

The LoggerProvider

The LoggerProvider is the guy who creates the logger instances. Maybe it is not needed to create a logger instance per category, but this makes sense for some Loggers, like NLog or log4net. Doing this you are also able to choose different logging output targets per category if needed:

  public class ColoredConsoleLoggerProvider : ILoggerProvider
  {
    private readonly ColoredConsoleLoggerConfiguration _config;
    private readonly ConcurrentDictionary<string, ColoredConsoleLogger> _loggers = new ConcurrentDictionary<string, ColoredConsoleLogger>();

    public ColoredConsoleLoggerProvider(ColoredConsoleLoggerConfiguration config)
    {
      _config = config;
    }

    public ILogger CreateLogger(string categoryName)
    {
      return _loggers.GetOrAdd(categoryName, name => new ColoredConsoleLogger(name, _config));
    }

    public void Dispose()
    {
      _loggers.Clear();
    }
  }

There's no magic here. The method CreateLogger creates a single instance of the ColoredConsoleLogger per category name and stores it in the dictionary.

Usage

Now we are able to use the logger in the Startup.cs

public void Configure(IApplicationBuilder app, IHostingEnvironment env, ILoggerFactory loggerFactory)
{
  loggerFactory.AddConsole(Configuration.GetSection("Logging"));
  loggerFactory.AddDebug();
  // here is our CustomLogger
  loggerFactory.AddProvider(new ColoredConsoleLoggerProvider(new ColoredConsoleLoggerConfiguration
  {
    LogLevel = LogLevel.Information,
    Color = ConsoleColor.Blue
  }));
  loggerFactory.AddProvider(new ColoredConsoleLoggerProvider(new ColoredConsoleLoggerConfiguration
  {
    LogLevel = LogLevel.Debug,
    Color = ConsoleColor.Gray
  }));

But this doesn't really look nice from my point of view. I want to use something like this:

loggerFactory.AddColoredConsoleLogger(c =>
{
  c.LogLevel = LogLevel.Information;
  c.Color = ConsoleColor.Blue;
});
loggerFactory.AddColoredConsoleLogger(c =>
{
  c.LogLevel = LogLevel.Debug;
 c.Color = ConsoleColor.Gray;
});

This means we need to write at least one extension method for the ILoggerFactory:

public static class ColoredConsoleLoggerExtensions
{
  public static ILoggerFactory AddColoredConsoleLogger(this ILoggerFactory loggerFactory, ColoredConsoleLoggerConfiguration config)
  {
    loggerFactory.AddProvider(new ColoredConsoleLoggerProvider(config));
    return loggerFactory;
  }
  public static ILoggerFactory AddColoredConsoleLogger(this ILoggerFactory loggerFactory)
  {
    var config = new ColoredConsoleLoggerConfiguration();
    return loggerFactory.AddColoredConsoleLogger(config);
  }
  public static ILoggerFactory AddColoredConsoleLogger(this ILoggerFactory loggerFactory, Action<ColoredConsoleLoggerConfiguration> configure)
  {
    var config = new ColoredConsoleLoggerConfiguration();
    configure(config);
    return loggerFactory.AddColoredConsoleLogger(config);
  }
}

With this extension methods we are able to pass in an already defined configuration object, we can use the default configuration or use the configure Action as shown in the previous example:

loggerFactory.AddColoredConsoleLogger();
loggerFactory.AddColoredConsoleLogger(new ColoredConsoleLoggerConfiguration
{
  LogLevel = LogLevel.Debug,
  Color = ConsoleColor.Gray
});
loggerFactory.AddColoredConsoleLogger(c =>
{
  c.LogLevel = LogLevel.Information;
  c.Color = ConsoleColor.Blue;
});

Conclusion

This is how the output of that nonsense logger looks:

Now it's up to you to create a logger that writes the entries to a database, log file or whatever or just add an existing logger to your ASP.NET Core application.

Adding a custom dependency injection container in ASP.NET Core

$
0
0

ASP.NET Core is pretty flexible, customizable and extendable. You are able to change almost everything. Even the built-in dependency injection container can be replaced. This blog post will show you how to replace the existing DI container with another one. I'm going to use Autofac as a replacement.

Why should I do this?

There are not many reasons to replace the built-in dependency injection container, because it works pretty well for the most cases.

If you prefer a different dependency injection container, because of some reasons, you are able to do it. Maybe you know a faster container, if you like the nice features of Ninject to load dependencies dynamically from an assembly in a specific folder, by file patterns, and so on. I really miss this features in the built in container. It is possible to use another solution to to load dependencies from other libraries, but this is not as dynamic as the Ninject way.

Setup the Startup.cs

In ASP.NET Core the IServiceProvider is the component that resolves and creates the dependencies out of a IServiceCollection. The IServiceCollection needs to be manipulated in the method ConfigureServices within the Startup.cs if you want to add dependencies to the IServiceProvider.

The solution is to read the contents of the IServiceCollections to the own container and to provide an own implementation of a IServiceProvider to the application. Reading the IServiceCollection to the different container isn't that trivial, because you need to translate the different mappings types, which are probably not all available in all containers. E. g. the scoped registration (per request singleton) is a special one, that is only needed in web applications and not implemented in all containers.

Providing a custom IServiceprovider is possible by changing the method ConfigureServices a little bit:

public IServiceProvider ConfigureServices(IServiceCollection services)
{
  // Add framework services.
  services.AddMvc();

  return services.BuildServiceProvider();
}

The method now returns a IServiceprovider, which is created in the last line out of the IServiceCollection. It is needed to add the contents of the service collection to the container you want to use, because ASP.NET actually adds around 40 dependencies before this method is called:

1: Singleton - Microsoft.AspNetCore.Hosting.IHostingEnvironment => Microsoft.AspNetCore.Hosting.Internal.HostingEnvironment
2: Singleton - Microsoft.Extensions.Logging.ILogger`1 => Microsoft.Extensions.Logging.Logger`1
3: Transient - Microsoft.AspNetCore.Hosting.Builder.IApplicationBuilderFactory => Microsoft.AspNetCore.Hosting.Builder.ApplicationBuilderFactory
4: Transient - Microsoft.AspNetCore.Http.IHttpContextFactory => Microsoft.AspNetCore.Http.HttpContextFactory
5: Singleton - Microsoft.Extensions.Options.IOptions`1 => Microsoft.Extensions.Options.OptionsManager`1
6: Singleton - Microsoft.Extensions.Options.IOptionsMonitor`1 => Microsoft.Extensions.Options.OptionsMonitor`1
7: Scoped - Microsoft.Extensions.Options.IOptionsSnapshot`1 => Microsoft.Extensions.Options.OptionsSnapshot`1
8: Transient - Microsoft.AspNetCore.Hosting.IStartupFilter => Microsoft.AspNetCore.Hosting.Internal.AutoRequestServicesStartupFilter
9: Transient - Microsoft.Extensions.DependencyInjection.IServiceProviderFactory`1[[Microsoft.Extensions.DependencyInjection.IServiceCollection, Microsoft.Extensions.DependencyInjection.Abstractions, Version=1.1.0.0, Culture=neutral, PublicKeyToken=adb9793829ddae60]] => Microsoft.Extensions.DependencyInjection.DefaultServiceProviderFactory
10: Singleton - Microsoft.Extensions.ObjectPool.ObjectPoolProvider => Microsoft.Extensions.ObjectPool.DefaultObjectPoolProvider
11: Transient - Microsoft.Extensions.Options.IConfigureOptions`1[[Microsoft.AspNetCore.Server.Kestrel.KestrelServerOptions, Microsoft.AspNetCore.Server.Kestrel, Version=1.1.1.0, Culture=neutral, PublicKeyToken=adb9793829ddae60]] => Microsoft.AspNetCore.Server.Kestrel.Internal.KestrelServerOptionsSetup
12: Singleton - Microsoft.AspNetCore.Hosting.Server.IServer => Microsoft.AspNetCore.Server.Kestrel.KestrelServer
13: Singleton - Microsoft.AspNetCore.Hosting.IStartup => Microsoft.AspNetCore.Hosting.ConventionBasedStartup
14: Singleton - Microsoft.AspNetCore.Http.IHttpContextAccessor => Microsoft.AspNetCore.Http.HttpContextAccessor
15: Singleton - Microsoft.ApplicationInsights.Extensibility.ITelemetryInitializer => Microsoft.ApplicationInsights.AspNetCore.TelemetryInitializers.AzureWebAppRoleEnvironmentTelemetryInitializer
16: Singleton - Microsoft.ApplicationInsights.Extensibility.ITelemetryInitializer => Microsoft.ApplicationInsights.AspNetCore.TelemetryInitializers.DomainNameRoleInstanceTelemetryInitializer
17: Singleton - Microsoft.ApplicationInsights.Extensibility.ITelemetryInitializer => Microsoft.ApplicationInsights.AspNetCore.TelemetryInitializers.ComponentVersionTelemetryInitializer
18: Singleton - Microsoft.ApplicationInsights.Extensibility.ITelemetryInitializer => Microsoft.ApplicationInsights.AspNetCore.TelemetryInitializers.ClientIpHeaderTelemetryInitializer
19: Singleton - Microsoft.ApplicationInsights.Extensibility.ITelemetryInitializer => Microsoft.ApplicationInsights.AspNetCore.TelemetryInitializers.OperationIdTelemetryInitializer
20: Singleton - Microsoft.ApplicationInsights.Extensibility.ITelemetryInitializer => Microsoft.ApplicationInsights.AspNetCore.TelemetryInitializers.OperationNameTelemetryInitializer
21: Singleton - Microsoft.ApplicationInsights.Extensibility.ITelemetryInitializer => Microsoft.ApplicationInsights.AspNetCore.TelemetryInitializers.SyntheticTelemetryInitializer
22: Singleton - Microsoft.ApplicationInsights.Extensibility.ITelemetryInitializer => Microsoft.ApplicationInsights.AspNetCore.TelemetryInitializers.WebSessionTelemetryInitializer
23: Singleton - Microsoft.ApplicationInsights.Extensibility.ITelemetryInitializer => Microsoft.ApplicationInsights.AspNetCore.TelemetryInitializers.WebUserTelemetryInitializer
24: Singleton - Microsoft.ApplicationInsights.Extensibility.ITelemetryInitializer => Microsoft.ApplicationInsights.AspNetCore.TelemetryInitializers.AspNetCoreEnvironmentTelemetryInitializer
25: Singleton - Microsoft.ApplicationInsights.Extensibility.TelemetryConfiguration => Microsoft.ApplicationInsights.Extensibility.TelemetryConfiguration
26: Singleton - Microsoft.ApplicationInsights.TelemetryClient => Microsoft.ApplicationInsights.TelemetryClient
27: Singleton - Microsoft.ApplicationInsights.AspNetCore.ApplicationInsightsInitializer => Microsoft.ApplicationInsights.AspNetCore.ApplicationInsightsInitializer
28: Singleton - Microsoft.ApplicationInsights.AspNetCore.DiagnosticListeners.IApplicationInsightDiagnosticListener => Microsoft.ApplicationInsights.AspNetCore.DiagnosticListeners.HostingDiagnosticListener
29: Singleton - Microsoft.ApplicationInsights.AspNetCore.DiagnosticListeners.IApplicationInsightDiagnosticListener => Microsoft.ApplicationInsights.AspNetCore.DiagnosticListeners.MvcDiagnosticsListener
30: Singleton - Microsoft.AspNetCore.Hosting.IStartupFilter => Microsoft.ApplicationInsights.AspNetCore.ApplicationInsightsStartupFilter
31: Singleton - Microsoft.ApplicationInsights.AspNetCore.JavaScriptSnippet => Microsoft.ApplicationInsights.AspNetCore.JavaScriptSnippet
32: Singleton - Microsoft.ApplicationInsights.AspNetCore.Logging.DebugLoggerControl => Microsoft.ApplicationInsights.AspNetCore.Logging.DebugLoggerControl
33: Singleton - Microsoft.Extensions.Options.IOptions`1[[Microsoft.ApplicationInsights.Extensibility.TelemetryConfiguration, Microsoft.ApplicationInsights, Version=2.2.0.0, Culture=neutral, PublicKeyToken=31bf3856ad364e35]] => Microsoft.Extensions.DependencyInjection.TelemetryConfigurationOptions
34: Singleton - Microsoft.Extensions.Options.IConfigureOptions`1[[Microsoft.ApplicationInsights.Extensibility.TelemetryConfiguration, Microsoft.ApplicationInsights, Version=2.2.0.0, Culture=neutral, PublicKeyToken=31bf3856ad364e35]] => Microsoft.Extensions.DependencyInjection.TelemetryConfigurationOptionsSetup
35: Singleton - Microsoft.Extensions.Options.IConfigureOptions`1[[Microsoft.ApplicationInsights.AspNetCore.Extensions.ApplicationInsightsServiceOptions, Microsoft.ApplicationInsights.AspNetCore, Version=2.0.0.0, Culture=neutral, PublicKeyToken=31bf3856ad364e35]] => Microsoft.AspNetCore.Hosting.DefaultApplicationInsightsServiceConfigureOptions
36: Singleton - Microsoft.Extensions.Logging.ILoggerFactory => Microsoft.Extensions.Logging.LoggerFactory
37: Singleton - System.Diagnostics.DiagnosticListener => System.Diagnostics.DiagnosticListener
38: Singleton - System.Diagnostics.DiagnosticSource => System.Diagnostics.DiagnosticListener
39: Singleton - Microsoft.AspNetCore.Hosting.IApplicationLifetime => Microsoft.AspNetCore.Hosting.Internal.ApplicationLifetime

140 more services gets added by the AddMvc() method. And even more, if you want to use more components and frameworks, like Identity and Entity Framework Core.

Because of that, you should use the common way to add framework services to the IServiceCollection and read the added services to the other container afterwards.

The next lines with dummy code, shows you how the implementation could be look like:

public IServiceProvider ConfigureServices(IServiceCollection services)
{
  // Add framework services.  
  services.AddDbContext<ApplicationDbContext>(options =>
    options.UseSqlite(Configuration.GetConnectionString("DefaultConnection")));

  services.AddIdentity<ApplicationUser, IdentityRole>()
    .AddEntityFrameworkStores<ApplicationDbContext>()
    .AddDefaultTokenProviders();

  services.AddMvc();
  services.AddOtherStuff();

  // create custom container
  var container = new CustomContainer();
  
  // read service collection to the custom container
  container.RegisterFromServiceCollection(services);

  // use and configure the custom container
  container.RegisterSingelton<IProvider, MyProvider>();

  // creating the IServiceProvider out of the custom container
  return container.BuildServiceProvider();
}

The details of the implementation depends on how the container works. E. g. If I'm right, Laurent Bugnion's SimpleIOC already is a IServiceProvider and could be returned directly. Let's see how this works with Autofac:

Replacing with Autofac

Autofac provides an extension library to support this container in ASP.NET Core projects. I added both the container and the extension library packages from NuGet:

Autofac, 4.5.0
Autofac.Extensions.DependencyInjection, 4.1.0

I also added the related usings to the Startup.cs:

using Autofac;
using Autofac.Extensions.DependencyInjection;

Now I'm able to create the Autofac container in the ConfigureServices method:

public IServiceProvider ConfigureServices(IServiceCollection services)
{
  // Add framework services.  
  services.AddDbContext<ApplicationDbContext>(options =>
    options.UseSqlite(Configuration.GetConnectionString("DefaultConnection")));

  services.AddIdentity<ApplicationUser, IdentityRole>()
    .AddEntityFrameworkStores<ApplicationDbContext>()
    .AddDefaultTokenProviders();

  services.AddMvc();
  services.AddOtherStuff();
  
  // create a Autofac container builder
  var builder = new ContainerBuilder();

  // read service collection to Autofac
  builder.Populate(services);

  // use and configure Autofac
  builder.RegisterType<MyProvider>().As<IProvider>();

  // build the Autofac container
  ApplicationContainer = builder.Build();
  
  // creating the IServiceProvider out of the Autofac container
  return new AutofacServiceProvider(ApplicationContainer);
}

// IContainer instance in the Startup class 
public IContainer ApplicationContainer { get; private set; }

With this implementation, Autofac is used as the dependency injection container in this ASP.NET application.

If you also want to resolve the controllers from the container, you should add this to the container too Otherwise the framework will resolve the Controllers and some special DI cases are not possible. A small call adds the Controllers to the IServiceColection:

services.AddMvc().AddControllersAsServices();

That's it.

More about Autofac: http://docs.autofac.org/en/latest/integration/aspnetcore.html

Conclusion

Fortunately Autofac supports the .NET Standard 1.6 and there is this nice extension library to get it working in ASP.NET too. Some other containers don't and it needs some more effort to get it running.

ASP.NET Core in trouble

$
0
0

ASP.NET Core today

Currently ASP.NET Core - Microsoft's new web framework - can be used on top of .NET Core and on top of the .NET Framework. This fact is pretty nice, because you are able to use all the new features of ASP.NET Core with the power of the huge but well known .NET Framework. On the other hand, the new cross-platform .NET Core is even nice, but with a smaller set of features. Today you have the choice between of being x-plat or to use the full .NET Framework. This isn't really bad.

Actually it could be better. Let's see why:

What is the issue?

Microsoft removed the support of the full .NET Framework for ASP.NET Core 2.0 and some developers are not really happy about that. See this Github Issue thread. ASP.NET Core 2.0 will just run on .NET Core 2.0. This fact results in a hot discussion within that GitHub issue.

It also results in some misleading and confusing headlines and contents on some German IT news publishers:

While the discussion was running, David Fowler said on Twitter that it's the best to think of ASP.NET Core 2.0 and .NET Core 2.0 as the same product.

Does this makes sense?

I followed the discussion and thought a lot about it. And yes, it starts to make sense to me.

NET Standard

What many people don't recognize or just forget about, is the .NET Standard. The .NET Standard is a API definition that tries to unify the APIs of .NET Core, .NET Framework and Xamarin. But it actually does a little more, it provides the API as a set of Assemblies, which forwards the types to the right Framework.

Does it make sense to you? (Read more about the .NET Standard in this documentation)

Currently ASP.NET Core runs on top of .NET Core and .NET Framework, but actually uses a framework that is based on .NET Standard 1.4 and higher. All the referenced libraries, which are used in ASP.NET Core are based on .NET Standard 1.4 or higher. Let's call them ".NET Standard libraries" ;) This libraries contain all the needed features, but doesn't reference a specific platform, but the .NET Standard API.

You are also able to create those kind of libraries with Visual Studio 2017.

By creating such libraries you provide your functionality to multiple platforms like Xamarin, .NET Framework and .NET Core (depending on the .NET Standard Version you choose). Isn't that good?

And in .NET Framework apps you are able to reference .NET Standard based libraries.

About runtimes

.NET Core is just a runtime to run Apps on Linux, Mac and Windows. Let's see the full .NET Framework as a runtime to run WPF apps, Winforms apps and classic ASP.NET apps on Windows. Let's also see Xamarin as a runtime to run apps on iOS and Android.

Let's also assume, that the .NET Standard 2.0 will provide the almost full API of the .NET Framework to your Application, if it is finished.

Do we really need the full .NET Framework for ASP.NET Core, in this case? No, we don't really need it.

What if ...

  • ... .NET Framework, .NET Core and Xamarin are just runtimes?
  • ... .NET Standard 2.0 is as complete as the .NET Framework?
  • .. .NET Standard 2.0 libraries will have the same features as the .NET Framework?
  • .. ASP.NET 2.0 Core uses the .NET Standard 2.0 libraries?

Do we really need the full .NET Framework as a runtime for ASP.NET Core?

I think, no!

Does it also makes sense to use the full .NET Framework as a runtime for Xamarin Apps?

I also think, no.

Conclusion

ASP.NET Core and .NET Core shouldn't be really shipped as one product, as David said. Because it is on top of .NET Core and maybe another technology could also be on top of .NET Core in the future. But maybe it makes sense to ship it as one product, to tell the people that ASP.NET Core 2.0 is based on top of .NET Core 2.0 and needs the .NET Core runtime. (The classic ASP.NET is also shipped with the full .NET Framework.)

  • .NET Core, Xamarin and the full .NET Framework are just a runtimes.
  • The .NET Standard 2.0 will almost have the same API as the .NET Framework.
  • The .NET Standard 2.0 libraries will have the same set of features as the .NET Framework
  • ASP.NET Core 2.0 uses NET Standard 2.0 libraries as a framework.

With this facts, Microsoft's decision to run ASP.NET Core 2.0 on .NET Core 2.0 only, doesn't sound that evil anymore.

From my perspective, ASP.NET is not in trouble and it's all fine and it makes absolutely sense. The troubles are only in the discussion about that on GitHub and on Twitter :)

What do you think? Do you agree?

Let's see what Microsoft will tell us about it at the Microsoft Build conference in the next days. Follow the live stream: https://channel9.msdn.com/Events/Build/2017

[Update 2017-05-11]

Yesterday in an official blog post of announcing ASP.NET Core 2.0 preview1, (Announcing ASP.NET 2.0.0-Preview1 and Updates for .NET Web Developers) Jeff Fritz wrote, that the preview 1 is limited to .NET Core 2.0 only. The overall goal is to put ASP.NET Core 2.0 on top of .NET Standard 2.0. This means it will be possible to run ASP.NET Core 2.0 apps on .NET Core, Mono and the full .NET Framework.

Exploring GraphQL and creating a GraphQL endpoint in ASP.NET Core

$
0
0

A few weeks ago, I found some time to have a look at GraphQL and even at the .NET implementation of GraphQL. It is pretty amazing to see it in actions and it is easier than expected to create a GraphQL endpoint in ASP.NET Core. In this post I'm going to show you how it works.

The Graph Query Language

The GraphQL was invented by Facebook in 2012 and released to the public in 2015. It is a query language to tell the API exactly about the data you wanna have. This is the difference between REST, where you need to query different resources/URIs to get different data. In GrapgQL there is one single point of access about the data you want to retrieve.

That also makes the planning about the API a little more complex. You need to think about what data you wanna provide and you need to think about how you wanna provide that data.

While playing around with it, I created a small book database. The idea is to provide data about books and authors.

Let's have a look into few examples. The query to get the book number and the name of a specific book looks like this.

{
  book(isbn: "822-5-315140-65-3"){
    isbn,
    name
  }
}

This look similar to JSON but it isn't. The property names are not set in quotes, which means it is not really a JavaScript Object Notation. This query need to be sent inside the body of an POST request to the server.

The Query gets parsed and executed against a data source on the server and the server should send the result back to the client:

{"data": {"book": {"isbn": "822-5-315140-65-3","name": "ultrices enim mauris parturient a"
    }
  }
}

If we want to know something about the author, we need to ask about it:

{
  book(isbn: "822-5-315140-65-3"){
    isbn,
    name,
    author{
      id,
      name,
      birthdate
    }
  }
}

This is the possible result:

{"data": {"book": {"isbn": "822-5-315140-65-3","name": "ultrices enim mauris parturient a","author": {"id": 71,"name": "Henderson","birthdate": "1937-03-20T06:58:44Z"
      }
    }
  }
}

You need a list of books, including the authors? Just ask for it:

{
  books{
    isbn,
    name,
    author{
      id,
      name,
      birthdate
    }
  }
}

The list is too large? Just limit the result, to get only 20 items:

{
  books(limit: 20) {
    isbn,
    name,
    author{
      id,
      name,
      birthdate
    }
  }
}

Isn't that nice?

To learn more about GraphQL and the specifications, visit http://graphql.org/

The Book Database

The book database is just fake. I love to use GenFu to generate dummy data. So I did the same for the books and the authors and created a BookRepository:

public class BookRepository : IBookRepository
{
  private IEnumerable<Book> _books = new List<Book>();
  private IEnumerable<Author> _authors = new List<Author>();

  public BookRepository()
  {
    GenFu.GenFu.Configure<Author>()
      .Fill(_ => _.Name).AsLastName()
      .Fill(_=>_.Birthdate).AsPastDate();
    _authors = A.ListOf<Author>(40);

    GenFu.GenFu.Configure<Book>()
      .Fill(p => p.Isbn).AsISBN()
      .Fill(p => p.Name).AsLoremIpsumWords(5)
      .Fill(p => p.Author).WithRandom(_authors);
    _books = A.ListOf<Book>(100);
  }

  public IEnumerable<Author> AllAuthors()
  {
    return _authors;
  }

  public IEnumerable<Book> AllBooks()
  {
    return _books;
  }

  public Author AuthorById(int id)
  {
    return _authors.First(_ => _.Id == id);
  }

  public Book BookByIsbn(string isbn)
  {
    return _books.First(_ => _.Isbn == isbn);
  }
}

public static class StringFillerExtensions
{
  public static GenFuConfigurator<T> AsISBN<T>(
    this GenFuStringConfigurator<T> configurator) where T : new()
  {
    var filler = new CustomFiller<string>(
      configurator.PropertyInfo.Name, 
      typeof(T), 
      () =>
      {
        return MakeIsbn();
      });
    configurator.Maggie.RegisterFiller(filler);
    return configurator;
  }
  public static string MakeIsbn()
  {
    // 978-1-933988-27-6
    var a = A.Random.Next(100, 999);
    var b = A.Random.Next(1, 9);
    var c = A.Random.Next(100000, 999999);
    var d = A.Random.Next(10, 99);
    var e = A.Random.Next(1, 9);
    return $"{a}-{b}-{c}-{d}-{e}";
  }
}

GenFu provides a useful set of so called fillers to generate data randomly. There are fillers to generate URLs, emails, names, last names, states of US and Canada and so on. I also need a ISBN generator, so I created one by extending the generic GenFuStringConfigurator.

The BookRepository is registered as a singleton in the Dependency Injection container, to work with the same set of data while the application is running. You are able to add some more information to that repository, like publishers and so on.

GraphQL in ASP.NET Core

Fortunately there is a .NET Standard compatible implementation of the GraphQL on GitHub. So there's no need to parse the Queries by yourself. This library is also available as a NuGet package:

<PackageReference Include="GraphQL" Version="0.15.1.678" />

The examples provided on GitHub, are pretty easy. They directly write the result to the output, which means the entire ASP.NET Applications is a GraphQL server. But I want to add GraphQL as a ASP.NET Core MiddleWare, to add the GraphQL implementation as a different part of the Application. Like this you are able to use REST based POST and PUT request to add or update the data and to use the GraphQL to query the data.

I also want that the middleware is listening to the sub path "/graph"

public class GraphQlMiddleware
{
  private readonly RequestDelegate _next;
  private readonly IBookRepository _bookRepository;

  public GraphQlMiddleware(RequestDelegate next, IBookRepository bookRepository)
  {
    _next = next;
    _bookRepository = bookRepository;
  }

  public async Task Invoke(HttpContext httpContext)
  {
    var sent = false;
    if (httpContext.Request.Path.StartsWithSegments("/graph"))
    {
      using (var sr = new StreamReader(httpContext.Request.Body))
      {
        var query = await sr.ReadToEndAsync();
        if (!String.IsNullOrWhiteSpace(query))
        {
          var schema = new Schema { Query = new BooksQuery(_bookRepository) };
          var result = await new DocumentExecuter()
            .ExecuteAsync(options =>
                          {
                            options.Schema = schema;
                            options.Query = query;
                          }).ConfigureAwait(false);
          CheckForErrors(result);
          await WriteResult(httpContext, result);
          sent = true;
        }
      }
    }
    if (!sent)
    {
      await _next(httpContext);
    }
  }

  private async Task WriteResult(HttpContext httpContext, ExecutionResult result)
  {
    var json = new DocumentWriter(indent: true).Write(result);
    httpContext.Response.StatusCode = 200;
    httpContext.Response.ContentType = "application/json";
    await httpContext.Response.WriteAsync(json);
  }

  private void CheckForErrors(ExecutionResult result)
  {
    if (result.Errors?.Count > 0)
    {
      var errors = new List<Exception>();
      foreach (var error in result.Errors)
      {
        var ex = new Exception(error.Message);
        if (error.InnerException != null)
        {
          ex = new Exception(error.Message, error.InnerException);
        }
        errors.Add(ex);
      }
      throw new AggregateException(errors);
    }
  }
}

public static class GraphQlMiddlewareExtensions
{
  public static IApplicationBuilder UseGraphQL(this IApplicationBuilder builder)
  {
    return builder.UseMiddleware<GraphQlMiddleware>();
  }
}

With this kind of MiddleWare, I can extend my applications Startup.cs with GraphQL:

app.UseGraphQL();

As you can see, the BookRepository gets passed into this Middleware via constructor injection. The most important part is that line:

var schema = new Schema { Query = new BooksQuery(_bookRepository) };

This is where we create a schema, which is used by the GraphQL engine to provide the data. The schema defines the structure of the data you wanna provide. This is all done in a root type called BooksQuery. This type gets the BookRepostory.

This Query is a GraphType, provided by the GraphQL library. You need to derive from a ObjectGraphType and to configure the schema in the constructor:

public class BooksQuery : ObjectGraphType
{
  public BooksQuery(IBookRepository bookRepository)
  {
    Field<BookType>("book",
                    arguments: new QueryArguments(
                      new QueryArgument<StringGraphType>() { Name = "isbn" }),
                      resolve: context =>
                      {
                        var id = context.GetArgument<string>("isbn");
                        return bookRepository.BookByIsbn(id);
                      });

    Field<ListGraphType<BookType>>("books",
                                   resolve: context =>
                                   {
                                     return bookRepository.AllBooks();
                                   });
  }
}

Using the GraphQL library all types used in the Query to define the schema are any kind of GraphTypes, even the BookType:

public class BookType : ObjectGraphType<Book>
{
  public BookType()
  {
    Field(x => x.Isbn).Description("The isbn of the book.");
    Field(x => x.Name).Description("The name of the book.");
    Field<AuthorType>("author");
  }
}

The difference is just the generic ObjectGraphType which is also used for the AuthorType. The properties of the Book, which are simple types like the name or the ISBN are mapped directly with the lambda. The complex typed properties like the Author are mapped via another generic ObjectGraphType, which is ObjectGraphType in that case.

Like this you need to create your Schema, which can be used to query the data.

Conclusion

If you want to play around with this demo, I pushed it to a repository on GitHub.

This are my first steps using GraphQL and I really like it. I think this is pretty useful and will reduce the effort on both the client side and the server side a lot. Even if the effort to create the schema is lot more than creating just a Web API controller, but usually you need to create a lot more than just one single Web API controller.

This also reduces the amount of data between the client and the server, because the client could just load the needed data and don't need to GET or POST all unneeded stuff.

I think, I'll use it a lot more in the future projects.

What do you think?

A first glimpse into .NET Core 2.0 Preview 1 and ASP.​NET Core 2.0.0 Preview 1

$
0
0

At the Build 2017 conference Microsoft announced the preview 1 versions of .NET Core 2.0, of the .NET Standard 2.0 and ASP.NET Core 2.0. I recently had a quick look into it and want to show you a little bit about it with this post.

.NET Core 2.0 Preview 1

Rich Lander (Program Manager at Microsoft) wrote about the release of the preview 1, .NET Standard 2.0, tools support in this post: Announcing .NET Core 2.0 Preview 1. It is important to read the first part about the requirements carefully. Especially the requirement of Visual Studio 2017 15.3 Preview. At the first quick look I was wondering about the requirement of installing a preview version of Visual Studio 2017, because I have already installed the final version since a few months. But the details is in the numbers. The final version of Visual Studio 2017 is the 15.2. The new tooling for .NET Core 2.0 preview is in the 15.3 which is in preview currently.

So if you want to use .NET Core 2. preview 1 with Visual Studio 2017 you need to install the preview of 15.3

The good thing is, the preview can be installed side by side with the current final of Visual Studio 2017. It doesn't double the usage of disk space, because both versions are able share some SDKs, e.g. the Windows SDK. But you need to install the add-ins you want to use for this version separately.

After the Visual Studio you need to install the new .NET Core SDK which also installs NET Core 2.0 Preview 1 and the .NET CLI.

The .NET CLI

After the new version of .NET Core is installed type dotnet --version in a command prompt. It will show you the version of the currently used .NET SDK:

Wait. I installed a preview 1 version and this is now the default on the entire machine? Yes.

The CLI uses the latest installed SDK on the machine by default. But anyway you are able to run different .NET Core SDKs side by side. To see what versions are installed on our machine type dotnet --info in a command prompt and copy the first part of the base path and past it to a new explorer window:

You are able to use all of them if you want to.

This is possible by adding a "global.json" to your solution folder. This is a pretty small file which defines the SDK version you want to use:

{"projects": [ "src", "test" ],"sdk": {"version": "1.0.4"
  }
}

Inside the folder "C:\git\dotnetcore", I added two different folders: the "v104" should use the current final version 1.0.4 and the "v200" should use the preview 1 of 2.0.0. to get it working I just need to put the "global.json" into the "v104" folder:

The SDK

Now I want to have a look into the new SDK. The first thing I do after installing a new version is to type dotnet --help in a command prompt. The first level help doesn't contain any surprises, just the version number differs. The most interesting difference is visible by typing dotnet new --help. We get a new template to add an ASP.NET Core Web App based on Razor pages. We also get the possibility to just add single files, like a razor page, "NuGet.config" or a "Web.Config". This is pretty nice.

I also played around with the SDK by creating a new console app. I typed dotnet new console -n consoleapp:

As you can see in the screenshot dotnet new will directly download the NuGet packages from the package source. It runs dotnet restore for you. It is not a super cool feature but good to know if you get some NuGet restore errors while creating a new app.

When I opened the "consoleapp.csproj", I saw the expected TargetFramework "netcoreapp2.0"

<Project Sdk="Microsoft.NET.Sdk"><PropertyGroup><OutputType>Exe</OutputType><TargetFramework>netcoreapp2.0</TargetFramework></PropertyGroup></Project>

This is the only difference between the 2.0.0 preview 1 and the 1.0.4

In ASP.NET Core are a lot more changes done. Let's have a quick look here too:

ASP.NET Core 2.0 Preview 1

Also for the ASP.NET 2.0 Preview 1, Jeffrey T. Fritz (Program Manager for ASP.NET) wrote a pretty detailed announcement post in the webdev blog: Announcing ASP.NET Core 2.0.0-Preview1 and Updates for .NET Web Developers.

To create a new ASP.NET Web App, I need to type dotnet new mvc -n webapp in a command prompt window. This command immediately creates the web app and starts to download the needed packages:

Let's see what changed, starting with the "Program.cs":

public class Program
{
  public static void Main(string[] args)
  {
    BuildWebHost(args).Run();
  }

  public static IWebHost BuildWebHost(string[] args) =>
    WebHost.CreateDefaultBuilder(args)
      .UseStartup<Startup>()
      .Build();
}

The first thing I mentioned is the encapsulation of the code that creates and configures the WebHostBuilder. In the previous versions it was all in the static void main. But there's no instantiation of the WebHostBuilder anymore. This is hidden in the .CreateDefaultBuilder() method. This look a little cleaner now, but also hides the configuration from the developer. It is anyway possible to use the old way to configure the WebHostBuilder, but this wrapper does a little more than the old configuration. This Method also wraps the configuration of the ConfigurationBuilder and the LoggerFactory. The default configurations were moved from the "Startup.cs" to the .CreateDefaultBuilder(). Let's have a look into the "Startup.cs":

public class Startup
{
  public Startup(IConfiguration configuration)
  {
    Configuration = configuration;
  }

  public IConfiguration Configuration { get; }

  // This method gets called by the runtime. Use this method to add services to the container.
  public void ConfigureServices(IServiceCollection services)
  {
    services.AddMvc();
  }

  // This method gets called by the runtime. Use this method to configure the HTTP request pipeline.
  public void Configure(IApplicationBuilder app, IHostingEnvironment env)
  {
    if (env.IsDevelopment())
    {
      app.UseDeveloperExceptionPage();
    }
    else
    {
      app.UseExceptionHandler("/Home/Error");
    }

    app.UseStaticFiles();

    app.UseMvc(routes =>
               {
                 routes.MapRoute(
                   name: "default",
                   template: "{controller=Home}/{action=Index}/{id?}");
               });
  }
}

Even this file is much cleaner now.

But if you now want to customize the Configuration, the Logging and the other stuff, you need to replace the .CreateDefaultBuilder() with the previous style of bootstrapping the application or you need to extend the WebHostBuilder returned by this method. You could have a look into the sources of the WebHost class in the ASP.NET repository on GitHub (around line 150) to see how this is done inside the .CreateDefaultBuilder(). The code of that method looks pretty familiar for someone who already used the previous version.

BTW: BrowserLink was removed from the templates of this preview version. Which is good from my perspective, because it causes an error while starting up the applications.

Result

This is just a first short glimpse into the .NET Core 2.0 Preview 1. I need some more time to play around with it and learn a little more about the upcoming changes. For sure I need to rewrite my post about the custom logging a little bit :)

BTW: Last week, I created a 45 min video about it in German. This is not a video with a good quality. It is quite bad. I just wanted to test a new microphone and Camtasia Studio and I chose ".NET Core 2.0 Preview 1" as the topic to present. Even if it has a awful quality, maybe it is anyway useful to some of my German speaking readers. :)

I'll come with some more .NET 2.0 topics within the next months.

GraphQL end-point Middleware for ASP.NET Core

$
0
0

The feedback about my last blog post about the GraphQL end-point in ASP.NET Core was amazing. That post was mentioned on reddit, many times shared on twitter, lInked on http://asp.net and - I'm pretty glad about that - it was mentioned in the ASP.NET Community Standup.

Because of that and because GraphQL is really awesome, I decided to make the GraphQL MiddleWare available as a NuGet package. I did some small improvements to make this MiddleWare more configurable and more easy to use in the Startup.cs

NuGet

Currently the package is a prerelease version. That means you need to activate to load preview versions of NuGet packages:

  • Package name: GraphQl.AspNetCore
  • Version: 1.0.0-preview1
  • https://www.nuget.org/packages/GraphQl.AspNetCore/

Install via Package Manager Console:

PM> Install-Package GraphQl.AspNetCore -Pre

Install via dotnet CLI:

dotnet add package GraphQl.AspNetCore --version 1.0.0-preview1

Using the library

You still need to configure your GraphQL schema using the graphql-dotnet library, as described in my last post. If this is done open your Startup.cs and add an using to the GraphQl.AspNetCore library:

using GraphQl.AspNetCore;

You can use two different ways to register the GraphQl Middleware:

app.UseGraphQl(new GraphQlMiddlewareOptions
{
  GraphApiUrl = "/graph", // default
  RootGraphType = new BooksQuery(bookRepository),
  FormatOutput = true // default: false
});
app.UseGraphQl(options =>
{
  options.GraphApiUrl = "/graph-api";
  options.RootGraphType = new BooksQuery(bookRepository);
  options.FormatOutput = false; // default
});

Personally I prefer the second way, which is more readable in my opinion.

The root graph type needs to be passed to the GraphQlMiddlewareOptions object, depending on the implementation of your root graph type, you may need to inject the data repository or a EntityFramework DbContext, or whatever you want to use to access your data. In this case I reuse the IBookRepository of the last post and pass it to the BooksQuery which is my root graph type.

I registered the repository like this:

services.AddSingleton<IBookRepository, BookRepository>();

and needed to inject it to the Configure method:

public void Configure(
  IApplicationBuilder app,
  IHostingEnvironment env,
  ILoggerFactory loggerFactory,
  IBookRepository bookRepository)
{
  // ...
}

Another valid option is to also add the BooksQuery to the dependency injection container and inject it to the Configure method.

Options

The GraphQlMiddlewareOptions are pretty simple. Currently there are only three properties to configure

  • RootGraphType: This configures your GraphQL query schema and needs to be set. If this property is unset an ArgumentNullException will be thrown.
  • GraphApiUrl: This property defines your GraphQL endpoint path. The default is set to /graph which means your endpoint is available under //yourdomain.tld/graph
  • FormatOutput: This property defines whether the output is prettified and indented for debugging purposes. The default is set to false.

This should be enough for the first time. If needed it is possible to expose the Newtonsoft.JSON settings, which are used in GraphQL library later on.

One more thing

I would be happy, if you try this library and get me some feedback about it. A demo application to quickly start playing around with it, is available on GitHub. Feel free to raise some issues and to create some PRs on GitHub to improve this MiddleWare.

Three times in a row

$
0
0

On July 1st, I got the email from the Global MVP Administrator. I got the MVP award the third time in a row :)

I'm pretty proud about that and I'm happy to be part of the great MVP community one year more. I'm also looking forward to the Global MVP Summit in March to meet all the other MVPs from around the world.

Not really a fan-boy...?

I'm also proud of that, because I don't really call me a Microsoft fan-boy. And sometimes, I also criticize some tools and platforms built by Microsoft (feel like a bad boy). But I like most of the development tools build by Microsoft and I like to use the tools, and frameworks and I really like the new and open Microsoft. The way how Microsoft now supports more than its own technologies and platforms. I like using VSCode, Typescript and Webpack to create NodeJS applications. I like VSCode and .NET Core on Linux to build Applications on a different platform than Windows. I also like to play around with UWP Apps on Windows for IoT on a Raspberry PI.

There are much more possibilities, much more platforms, much more customers to reach, using the current Microsoft development stack. And this is really fun to play with it, to use it in real project, to write about it in .NET magazines, in this blog and to talk about it in the user groups and on conferences.

Thanks

But I wouldn't get honored again without such a great development community. I wouldn't continue to contribute to the community without that positive feedback and without that great people. This is why the biggest "Thank You" goes to the development community :)

Sure, I also need to say "Thank You" to my great family (my lovely wife and my three kids) which supports me in spending som much time to contribute to the community. I also need to say Thanks to my company and my boss for supporting me and allowing me to use parts of my working time to contribute the the community.


LightCore is back - LightCore 2.0

$
0
0

Until now it is pretty hard to move an existing more complex .NET Framework library to .NET Core or .NET Standard 1.x. More complex in my case just means, e. g. that this specific library uses reflection a little more than maybe some others. I'm talking about the LightCore DI container.

I started to move it to .NET Core in November 2015, but gave up halve a year later. Because it needs much more time to port it to NET Core and because it makes much more sense to port it to the .NET Standard than to .NET Core. And the announcement of .NET Standard 2.0 makes me much more optimistic to get it done with pretty less effort. So I stopped moving it to .NET Core and .NET Standard 1.x and was waiting for .NET standard 2.0.

LightCore is back

Some weeks ago the preview version of .NET Standard 2.0 was announced and I tried it again. It works as expected. The API of .NET Standard 2.0 is big enough to get the old source of LightCore running. Also Rick Strahl did some pretty cool and detailed post about it:

The current status

  • I created .NET Standard 2.0 libraries for the most of the projects. I didn't change most parts of the code. The XAML configuration stuff was an exception.
  • I also ported the existing unit tests to .NET Core Xunit test libraries and the tests are running. That means LightCore is definitely running with .NET Core 2.0.
  • We'll get one breaking change: I moved the file based configuration from XAML to JSON, because the XAML serializer is not (maybe not yet) supported in .NET Standard.
  • We'll get another breaking change: I don't want to support Silverlight anymore.
    • Silverlight users should use the old packages instead. Sorry about that.

Roadmap

I don't really want to release the new version until the .NET Standard 2.0 is released. I don't want to have the preview versions of the .NET Standard libraries referenced in a final version of LightCore. That means, there is still some time to get the open issues done.

  • 2.0.0-preview1
    • End of July 2017
    • Uses the preview versions of .NET Standard 2.0 and .NET Core 2.0
  • 2.0.0-preview2
    • End of August 2017
    • Uses the preview versions of .NET Standard 2.0 and .NET Core 2.0. Maybe the finals, if they are released until that.
  • 2.0.0
    • September 2017
    • depends on the release of .NET Standard 2.0 and .NET Core 2.0

Open issues

The progress is good, but there is still something to do, before the release of the first preview:

Contributions

I'd like to call for contributions. Try LightCore, raise Issues, create PRs and whatever is needed to get LightCore back to life and whatever is needed to make it a lightweight, fast and easy to use DI container.

New Visual Studio Web Application: The ASP.NET Core Razor Pages

$
0
0

I think, everyone who followed the last couple of ASP.NET Community Standup session heard about Razor Pages. Did you try the Razor Pages? I didn't. I focused completely on ASP.NET Core MVC and Web API. With this post I'm going to have a first look into it. I'm going to try it out.

I was also a little bit skeptical about it and compared it to the ASP.NET Web Site project. That was definitely wrong.

You need to have the latest preview on Visual Studio 2017 installed on your machine, because the Razor Pages came with ASP.NET Core 2.0 preview. It is based on ASP.NET Core and part of the MVC framework.

Creating a Razor Pages project

Using Visual Studio 2017, I used "File... New Project" to create a new project. I navigate to ".NET Core", chose the "ASP.NET Core Web Application (.NET Core)" project and I chose a name and a location for that project.

In the next dialogue, I needed to switch to ASP.NET Core 2.0 to see all the new available project types. (I will write about the other one in the next posts.) I selected the "Web Application (Razor Pages)" and pressed "OK".

Program.cs and Startup.cs

I you are already familiar with ASP.NET core projects, you'll find nothing new in the Program.cs and in the Startup.cs. Both files look pretty much the same.

public class Program
{
  public static void Main(string[] args)
  {
    BuildWebHost(args).Run();
  }

  public static IWebHost BuildWebHost(string[] args) =>
    WebHost.CreateDefaultBuilder(args)
    .UseStartup<Startup>()
    .Build();
}

The Startup.cs has a services.AddMvc() and an app.UseMvc() with a configured route:

public void Configure(IApplicationBuilder app, IHostingEnvironment env)
{
  if (env.IsDevelopment())
  {
    app.UseDeveloperExceptionPage();
    app.UseBrowserLink();
  }
  else
  {
    app.UseExceptionHandler("/Error");
  }

  app.UseStaticFiles();

  app.UseMvc(routes =>
  {
    routes.MapRoute(
      name: "default",
      template: "{controller=Home}/{action=Index}/{id?}");
  });
}

That means the Razor Pages are actually part of the MVC framework, as Damien Edwards always said in the Community Standups.

The solution

But the solution looks a little different. Instead of a Views and a Controller folders, there is only a Pages folder with the razor files in it. Even there are known files: the _layout.cshtml, _ViewImports.cshtml, _ViewStart.cshtml.

Within the _ViewImports.cshtml we also have the import of the default TagHelpers

@namespace RazorPages.Pages
@addTagHelper *, Microsoft.AspNetCore.Mvc.TagHelpers

This makes sense, since the Razor Pages are part of the MVC Framework.

We also have the standard pages of every new ASP.NET project: Home, Contact and About. (I'm going to have a look at this files later on.)

As every new web project in Visual Studio, also this project type is ready to run. Pressing F5 starts the web application and opens the URL in the browser:

Frontend

For the frontend dependencies "bower" is used. It will put all the stuff into wwwroot/bin. So even this is working the same way as in MVC. Custom CSS and custom JavaScript ar in the css and the js folder under wwwroot. This should all be familiar for ASP.NET Corer developers.

Also the way the resources are used in the _Layout.cshtml are the same.

Welcome back "Code Behind"

This was my first thought for just a second, when I saw the that there are nested files under the Index, About, Contact and Error pages. At the first glimpse this files are looking almost like Code Behind files of Web Form based ASP.NET Pages, but are completely different:

public class ContactModel : PageModel
{
    public string Message { get; set; }

    public void OnGet()
    {
        Message = "Your contact page.";
    }
}

They are not called Page, but Model and they have something like an handler in it, to do something on a specific action. Actually it is not a handler, it is an an method which gets automatically invoked, if this method exists. This is a lot better than the pretty old Web Forms concept. The base class PageModel just provides access to some Properties like the Contexts, Request, Response, User, RouteData, ModelStates, ViewData and so on. It also provides methods to redirect to other pages, to respond with specific HTTP status codes, to sign-in and sign-out. This is pretty much it.

The method OnGet allows us to access the page via a GET request. OnPost does the same for POST. Gues what OnPut does ;)

Do you remember Web Forms? There's no need to ask if the current request is a GET or POST request. There's a single decoupled method per HTTP method. This is really nice.

On our Contact page, inside the method OnGet the message "Your contact page." will be set. This message gets displayed on the specific Contact page:

@page
@model ContactModel
@{
    ViewData["Title"] = "Contact";
}<h2>@ViewData["Title"].</h2><h3>@Model.Message</h3>

As you can see in the razor page, the PageModel is actually the model of that view which gets passed to the view, the same way as in ASP.Net MVC. The only difference is, that there's no Action to write code for and something will invoke the OnGet Method in the PageModel.

Conclusion

This is just a pretty fast first look, but the Razor Pages seem to be pretty cool for small and low budget projects, e. g. for promotional micro sites with less of dynamic stuff. There's less code to write and less things to ramp up, no controllers and actions to think about. This makes it pretty easy to quickly start a project or to prototype some features.

But there's no limitation to do just small projects. It is a real ASP.NET Core application, which get's compiled and can easily use additional libraries. Even Dependency Injection is available in ASP.NET Core RazorPages. That means it is possible to let the application grow.

Even though it is possible to use the MVC concept in parallel by adding the Controllers and the Views folders to that application. You can also share the _layout.cshtml between both, the Razor Pages and the VMC Views, just by telling the _ViewStart.cshtml where the _layout.cshtml is.

Don't believe me? Try this out: https://github.com/juergengutsch/razor-pages-demo/

I'm pretty sure I'll use it in some of my real projects in the future.

Creating an email form with ASP.NET Core Razor Pages

$
0
0

In the comments of my last post, I got asked to write about, how to create a email form using ASP.NET Core Razor Pages. The reader also asked about a tutorial about authentication and authorization. I'll write about this in one of the next posts. This post is just about creating a form and sending an email with the form values.

Creating a new project

To try this out, you need to have the latest Preview of Visual Studio 2017 installed. (I use 15.3.0 preview 3) And you need .NET Core 2.0 Preview installed (2.0.0-preview2-006497 in my case)

In Visual Studio 2017, use "File... New Project" to create a new project. Navigate to ".NET Core", chose the "ASP.NET Core Web Application (.NET Core)" project and choose a name and a location for that new project.

In the next dialogue, you probably need to switch to ASP.NET Core 2.0 to see all the new available project types. (I will write about the other ones in the next posts.) Select the "Web Application (Razor Pages)" and pressed "OK".

That's it. The new ASP.NET Core Razor Pages project is created.

Creating the form

It makes sense to use the contact.cshtml page to add the new contact form. The contact.cshtml.cs is the PageModel to work with. Inside this file, I added a small class called ContactFormModel. This class will contain the form values after the post request was sent.

public class ContactFormModel
{
  [Required]
  public string Name { get; set; }
  [Required]
  public string LastName { get; set; }
  [Required]
  public string Email { get; set; }
  [Required]
  public string Message { get; set; }
}

To use this class, we need to add a property of this type to the ContactModel:

[BindProperty]
public ContactFormModel Contact { get; set; }

This attribute does some magic. It automatically binds the ContactFormModel to the view and contains the data after the post was sent back to the server. It is actually the MVC model binding, but provided in a different way. If we have the regular model binding, we should also have a ModelState. And we actually do:

public async Task<IActionResult> OnPostAsync()
{
  if (!ModelState.IsValid)
  {
    return Page();
  }

  // create and send the mail here

  return RedirectToPage("Index");
}

This is an async OnPost method, which looks pretty much the same as a controller action. This returns a Task of IActionResult, checks the ModelState and so on.

Let's create the HTML form for this code in the contact.cshtml. I use bootstrap (just because it's available) to format the form, so the HTML code contains some overhead:

<div class="row"><div class="col-md-12"><h3>Contact us</h3></div></div><form class="form form-horizontal" method="post"><div asp-validation-summary="All"></div><div class="row"><div class="col-md-12"><div class="form-group"><label asp-for="Contact.Name" class="col-md-3 right">Name:</label><div class="col-md-9"><input asp-for="Contact.Name" class="form-control" /><span asp-validation-for="Contact.Name"></span></div></div></div></div><div class="row"><div class="col-md-12"><div class="form-group"><label asp-for="Contact.LastName" class="col-md-3 right">Last name:</label><div class="col-md-9"><input asp-for="Contact.LastName" class="form-control" /><span asp-validation-for="Contact.LastName"></span></div></div></div></div><div class="row"><div class="col-md-12"><div class="form-group"><label asp-for="Contact.Email" class="col-md-3 right">Email:</label><div class="col-md-9"><input asp-for="Contact.Email" class="form-control" /><span asp-validation-for="Contact.Email"></span></div></div></div></div><div class="row"><div class="col-md-12"><div class="form-group"><label asp-for="Contact.Message" class="col-md-3 right">Your Message:</label><div class="col-md-9"><textarea asp-for="Contact.Message" rows="6" class="form-control"></textarea><span asp-validation-for="Contact.Message"></span></div></div></div></div><div class="row"><div class="col-md-12"><button type="submit">Send</button></div></div></form>

This also looks pretty much the same as in common ASP.NET Core MVC views. There's no difference.

BTW: I'm still impressed by the tag helpers. This guys even makes writing and formatting code snippets a lot easier.

Acessing the form data

As I wrote some lines above, there is a model binding working for you. This fills up the property Contact with data and makes it available in the OnPostAsync() method, if the attribute BindProperty is set.

[BindProperty]
public ContactFormModel Contact { get; set; }

Actually, I expected to have a model, passed as argument to the OnPost, as I saw it the first time. But you are able to use the property directly, without any other action to do:

var mailbody = $@"Hallo website owner,

This is a new contact request from your website:

Name: {Contact.Name}
LastName: {Contact.LastName}
Email: {Contact.Email}
Message: ""{Contact.Message}""


Cheers,
The websites contact form";

SendMail(mailbody);

That's nice, isn't it?

Sending the emails

Thanks to the pretty awesome .NET Standard 2.0 and the new APIs available for .NET Core 2.0, it get's even nicer:

// irony on

Finally in .NET Core 2.0, it is now possible to send emails directly to an SMTP server using the famous and pretty well known System.Net.Mail.SmtpClient():

private void SendMail(string mailbody)
{
  using (var message = new MailMessage(Contact.Email, "me@mydomain.com"))
  {
    message.To.Add(new MailAddress("me@mydomain.com"));
    message.From = new MailAddress(Contact.Email);
    message.Subject = "New E-Mail from my website";
    message.Body = mailbody;

    using (var smtpClient = new SmtpClient("mail.mydomain.com"))
    {
      smtpClient.Send(message);
    }
  }
}

Isn't that cool?

// irony off

It definitely works and this is actually a good thing.

In previews .NET Core versions it was recommended to use an external mail delivery service like SendGrid. This kind of services usually provide a REST based API , which can be used to communicate with that specific service. Some of them also provide various client libraries for the different platforms and languages to wrap that APIs and makes them easier to use.

I'm anyway a huge fan of such services, because they are easier to use and I don't need to handle message details like encoding. I don't need to care about SMTP hosts and ports, because it is all HTTPS. I don't really need to care as much about spam handling, because this is done by the service. Using such services I just need to configure the sender mail address, maybe a domain, but the DNS settings are done by them.

SendGrid could be bought via the Azure marketplace and contains huge number of free emails to send. I would propose to use such services whenever it's possible. The SmtpClient is good in enterprise environments where you don't need to go threw the internet to send mails. But maybe the Exchanges API is another or better option in enterprise environments.

Conclusion

The email form is working and it is actually not much code written by myself. That's awesome. For such scenarios the razor pages are pretty cool and easy to use. There's no Controller to set-up, the views and the PageModels are pretty close and the code to generate one page is not distributed over three different folders as in MVC. To create bigger applications, MVC is for sure the best choice, but I really like the possibility to keep small apps as simple as possible.

Querying AD in SQL Server via LDAP provider

$
0
0

This is kinda off-topic, because it's not about ASP.NET Core, but l really like it to share. I recently needed to import some additional user data via a nightly run into a SQL Server Database. The base user data came from a SAP database via an CSV bulk import. But not all of the data. E.g. the telephone numbers are maintained mostly by the users itself in the AD. After SAP import, we need to update the telephone numbers with the data from the AD.

The bulk import was done with a stored procedure and executed nightly with an SQL Server job. So it makes sense to do the AD import with a stored procedure too. I wasn't really sure whether this works via the SQL server.

My favorite programming languages are C# and JavaScript, and I'm not really a friend of T-SQL, but I tried it. I googled around a little bit and found a solution quick solution in T-SQL.

The trick is map the AD via an LDAP provider as a linked server to the SQL Server. This can even be done via a dialogue, but I never got it running like this, so I chose the way to use T-SQL instead:

USE [master]
GO 
EXEC master.dbo.sp_addlinkedserver @server = N'ADSI', @srvproduct=N'Active Directory Service Interfaces', @provider=N'ADSDSOObject', @datasrc=N'adsdatasource'
EXEC master.dbo.sp_addlinkedsrvlogin @rmtsrvname=N'ADSI',@useself=N'False',@locallogin=NULL,@rmtuser=N'<DOMAIN>\<Username>',@rmtpassword='*******'
GO 
EXEC master.dbo.sp_serveroption @server=N'ADSI', @optname=N'collation compatible',  @optvalue=N'false'
GO 
EXEC master.dbo.sp_serveroption @server=N'ADSI', @optname=N'data access', @optvalue=N'true'
GO 
EXEC master.dbo.sp_serveroption @server=N'ADSI', @optname=N'dist', @optvalue=N'false'
GO 
EXEC master.dbo.sp_serveroption @server=N'ADSI', @optname=N'pub', @optvalue=N'false'
GO 
EXEC master.dbo.sp_serveroption @server=N'ADSI', @optname=N'rpc', @optvalue=N'false'
GO 
EXEC master.dbo.sp_serveroption @server=N'ADSI', @optname=N'rpc out', @optvalue=N'false'
GO 
EXEC master.dbo.sp_serveroption @server=N'ADSI', @optname=N'sub', @optvalue=N'false'
GO 
EXEC master.dbo.sp_serveroption @server=N'ADSI', @optname=N'connect timeout', @optvalue=N'0'
GO 
EXEC master.dbo.sp_serveroption @server=N'ADSI', @optname=N'collation name', @optvalue=null
GO 
EXEC master.dbo.sp_serveroption @server=N'ADSI', @optname=N'lazy schema validation',  @optvalue=N'false'
GO 
EXEC master.dbo.sp_serveroption @server=N'ADSI', @optname=N'query timeout', @optvalue=N'0'
GO 
EXEC master.dbo.sp_serveroption @server=N'ADSI', @optname=N'use remote collation',  @optvalue=N'true'
GO 
EXEC master.dbo.sp_serveroption @server=N'ADSI', @optname=N'remote proc transaction promotion', @optvalue=N'true'
GO

You can to use this script to set-up a new linked server to AD. Just set the right user and password to the second T-SQL statement. This user should have read access to the AD. A specific service account would make sense here. Don't save the script with the user credentials in it. Once the linked server is set-up, you don't need this script anymore.

This setup was easy. The most painful part, was to setup a working query.

SELECT * FROM OpenQuery ( 
  ADSI,  
  'SELECT cn, samaccountname, mail, mobile, telephonenumber, sn, givenname, co, company
  FROM ''LDAP://DC=company,DC=domain,DC=controller'' 
  WHERE objectClass = ''User'' and co = ''Switzerland''
  ') AS tblADSI
  WHERE mail IS NOT NULL AND (telephonenumber IS NOT NULL OR mobile IS NOT NULL)
ORDER BY cn

Any error in the Query to execute resulted in an generic error message, which told me that there was an problem to built this query. Not really helpful.

It took me two hours to find the right LDAP connection string and some more hours to find the right properties the query.

The other painful thing are the conditions. Because the where clause outside the OpenQuery couldn't be run inside the OpenQuery. Don't ask me why. My Idea was to limit the result set completely with the query inside the OpenQuery, but was only able to limit to the objectType "User" and to the country. Also the AD need to be maintained in a proper way: e.g. the field company btw. didn't return the company (which should be the same in the entire company) but the company units.

BTW: the column order in the result set is completely the other way round, than defined in the query.

Later, I could limit the result set to existing emails (to find out whether this is a real user) and existing telephone numbers.

The rest is easy: Wrap that query in a stored procedure, iterate threw all of the users, find the related ones in the database (previously imported from SAP) and update the telephone numbers.

Current Activities

$
0
0

Wow! Some weeks without a new blog post. My plan was to write at least one post per week. But this doesn't always work. Usually I write in the train, when I go to work to Basel (CH). Sometimes I write two or three posts in advance, to publish it later on. But I had some vacation, worked two weeks completely at home, and I had some other things to prepare and to manage. This is a short overview of the current activities:

INETA Germany

The last year was kinda busy, even from the developer community perspective. The leadership of the INETA Germany was one, but a pretty small part. We are currently planning some huge changes with the INETA Germany. One of the changes is to open the INETA Germany for Austrian and Swiss user groups and speakers. We already have some Austrian and Swiss speakers registered in the Speakers Bureau. Contact us via hallo@ineta-deutschland.de, if you are a Austrian or Swiss user group and if you wanna be a INETA member.

Authoring articles for a magazine

Also the last twelve months was busy, because almost every month I wrote an article for one of the most popular German speaking developer Magazine. All this articles were about ASP.NET Core and .NET Core. Here is a list of them:

And there will be some more in the next months.

Technical Review of a book

For the first time I do a technical review for a book about "ASP.NET Core 2.0 and Angular 4". I'm a little bit proud of getting asked doing it. The author is one of the famous European authors and this book is awesome and great for Angular and ASP.NET Core beginners. Unfortunately I cannot yet mention the Authors name and link to the book title, but I will definitely if it is finished.

Talks

What else? Yes I was talking and I will talk about various topics.

In August I did a talk at the Zurich Azure meetup about how we (the yooapps.com) created the digital presentation (web site, mobile apps) for one of the most successful soccer clubs in Switzerland on Microsoft Azure. It is also about how we maintain it and how we deploy it to Azure. I'l do the talk at the Basel .NET User Group today and in October at the Azure meetup Karlsruhe. I'd like to do this talk at a lot more user groups, because we are kinda proud of that project. Contact me, if you like to have this talk in your user group. (BTW: I'm in the Seattle (WA) area at the beginning of March 2018. So I could do this talk in Seattle or Portland too.)

Title: Soccer in the cloud – FC Basel on Azure

Abstract: Three years ago we released a completely new version of the digital presentation (website, mobile apps, live ticker, image database, videos, shop and extranet) of one of the most successful soccer clubs In Switzerland. All of the services of that digital presentation are designed to run on Microsoft Azure. Since then we are continuously working on it, adding new features, integrating new services and improving performance, security and so on. This talk is about, how the digital presentation was built, how it works and how we continuously deploy new feature and improvements to Azure.

At the ADC 2017 in Cologne I talked about customizing ASP.NET Core (sources on GitHub) and I did a one day workshop about developing a web application using ASP.NET Core (sources on GitHub)

Also in October I do an introduction talk about .NET Core, .NET Standard and ASP.NET Core at the "Azure & .NET meetup Freiburg" (Germany)

Open Source:

One Project that should be released for a while is LightCore. Unfortunately I didn't find some time the last weeks to work on that. Also Peter Bucher (who initially created that project and is currently working on that) was busy too. We Currently have a critical bug, which needs to be solved first, before we are able to release. Even the ASP.NET Core integrations needs to be finished first.

Doing a lot of sports

Since almost 18 Months, I do a lot of running and biking. This also takes some time, but is a lot of addictive fun. I cannot live two days without being outside running and biking. I wouldn't believe that, if you told me about it two years before. That changed my life a lot. I attend official runs and bike races and last but not least: I lost around 20 kilos the last one and a half years.

Unit Testing an ASP.​NET Core Application

$
0
0

ASP.NET Core 2.0 is out and it is great. Testing worked well in the previous versions, but in 2.0 it is much more easier.

Xunit, Moq and FluentAssertions are working great with the new Version of .NET Core and ASP.NET Core. Using this tools Unit Testing is really fun. Even more fun with testing is provided in ASP.NET Core. Testing Controllers wasn't easier in the previous versions.

If you remember the old Web API and MVC version, based on System.Web, you'll probably also remember how to write unit test for the Controllers.

In this post I'm going to show you how to unit test your controllers and how to write integration tests for your controllers.

Preparing the project to test:

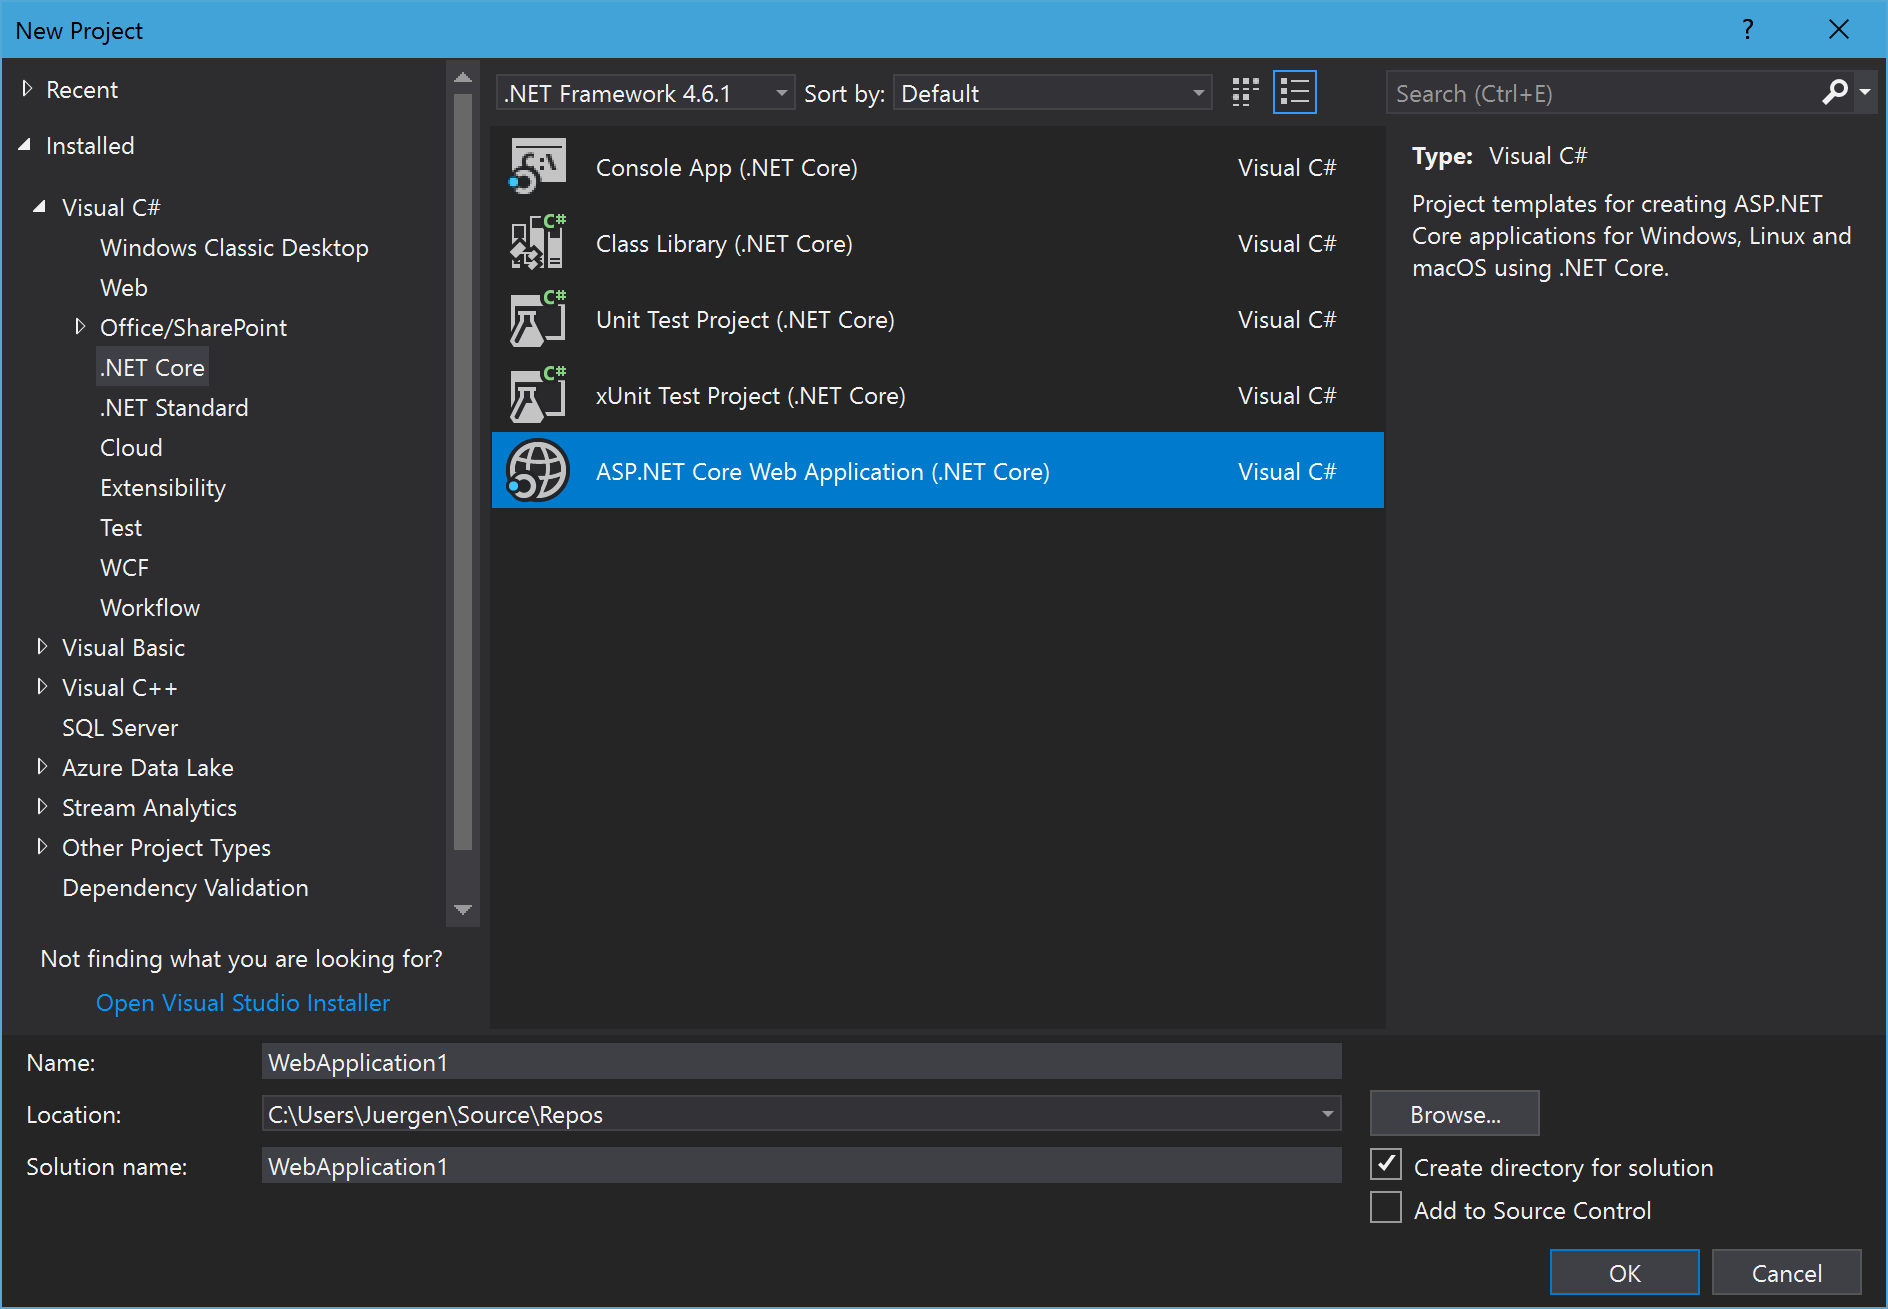
To show you how this works, I created a new "ASP.NET Core Web Application" :

Now I needed to select the Web API project. Be sure to select ".NET Core" and "ASP.NET Core 2.0":

To keep this post simple, I didn't select an authentication type.

In this project is nothing special, except the new PersonsController, which is using a PersonService:

[Route("api/[controller]")]
public class PersonsController : Controller
{
    private IPersonService _personService;

    public PersonsController(IPersonService personService)
    {
        _personService = personService;
    }
    // GET api/values
    [HttpGet]
    public async Task<IActionResult> Get()
    {
        var models = _personService.GetAll();

        return Ok(models);
    }

    // GET api/values/5
    [HttpGet("{id}")]
    public async Task<IActionResult> Get(int id)
    {
        var model = _personService.Get(id);

        return Ok(model);
    }

    // POST api/values
    [HttpPost]
    public async Task<IActionResult> Post([FromBody]Person model)
    {
        if (!ModelState.IsValid)
        {
            return BadRequest(ModelState);
        }

        var person = _personService.Add(model);

        return CreatedAtAction("Get", new { id = person.Id }, person);
    }

    // PUT api/values/5
    [HttpPut("{id}")]
    public async Task<IActionResult> Put(int id, [FromBody]Person model)
    {
        if (!ModelState.IsValid)
        {
            return BadRequest(ModelState);
        }

        _personService.Update(id, model);

        return NoContent();
    }

    // DELETE api/values/5
    [HttpDelete("{id}")]
    public async Task<IActionResult> Delete(int id)
    {
        _personService.Delete(id);
        return NoContent();
    }
}

The Person class is created in a new folder "Models" and is a simple POCO:

public class Person
{
  public int Id { get; set; }
  [Required]
  public string FirstName { get; set; }
  [Required]
  public string LastName { get; set; }
  public string Title { get; set; }
  public int Age { get; set; }
  public string Address { get; set; }
  public string City { get; set; }
  [Required]
  [Phone]
  public string Phone { get; set; }
  [Required]
  [EmailAddress]
  public string Email { get; set; }
}

The PersonService uses GenFu to auto generate a list of Persons:

public class PersonService : IPersonService
{
    private List<Person> Persons { get; set; }

    public PersonService()
    {
        var i = 0;
        Persons = A.ListOf<Person>(50);
        Persons.ForEach(person =>
        {
            i++;
            person.Id = i;
        });
    }

    public IEnumerable<Person> GetAll()
    {
        return Persons;
    }

    public Person Get(int id)
    {
        return Persons.First(_ => _.Id == id);
    }

    public Person Add(Person person)
    {
        var newid = Persons.OrderBy(_ => _.Id).Last().Id + 1;
        person.Id = newid;

        Persons.Add(person);

        return person;
    }

    public void Update(int id, Person person)
    {
        var existing = Persons.First(_ => _.Id == id);
        existing.FirstName = person.FirstName;
        existing.LastName = person.LastName;
        existing.Address = person.Address;
        existing.Age = person.Age;
        existing.City = person.City;
        existing.Email = person.Email;
        existing.Phone = person.Phone;
        existing.Title = person.Title;
    }

    public void Delete(int id)
    {
        var existing = Persons.First(_ => _.Id == id);
        Persons.Remove(existing);
    }
}

public interface IPersonService
{
  IEnumerable<Person> GetAll();
  Person Get(int id);
  Person Add(Person person);
  void Update(int id, Person person);
  void Delete(int id);
}

This Service needs to be registered in the Startup.cs:

services.AddScoped<IPersonService, PersonService>();

If this is done, we can create the test project.

The unit test project

I always choose xUnit (or Nunit) over MSTest, but feel free to use MSTest. The used testing framework doesn't really matter.

Inside that project, I created two test classes: PersonsControllerIntegrationTests and PersonsControllerUnitTests

We need to add some NuGet packages. Right click the project in VS2017 to edit the project file and to add the references manually, or use the NuGet Package Manager to add these packages:

<PackageReference Include="Microsoft.AspNetCore.All" Version="2.0.0" /><PackageReference Include="Microsoft.AspNetCore.TestHost" Version="2.0.0" /><PackageReference Include="FluentAssertions" Version="4.19.2" /><PackageReference Include="Moq" Version="4.7.63" />

The first package contains the dependencies to ASP.NET Core. I use the same package as in the project to test. The second package is used for the integration tests, to build a test host for the project to test. FluentAssertions provides a more elegant way to do assertions. And Moq is used to create fake objects.

Let's start with the unit tests:

Unit Testing the Controller

We start with an simple example, by testing the GET methods only:

public class PersonsControllerUnitTests
{
  [Fact]
  public async Task Values_Get_All()
  {
    // Arrange
    var controller = new PersonsController(new PersonService());

    // Act
    var result = await controller.Get();

    // Assert
    var okResult = result.Should().BeOfType<OkObjectResult>().Subject;
    var persons = okResult.Value.Should().BeAssignableTo<IEnumerable<Person>>().Subject;

    persons.Count().Should().Be(50);
  }

  [Fact]
  public async Task Values_Get_Specific()
  {
    // Arrange
    var controller = new PersonsController(new PersonService());

    // Act
    var result = await controller.Get(16);

    // Assert
    var okResult = result.Should().BeOfType<OkObjectResult>().Subject;
    var person = okResult.Value.Should().BeAssignableTo<Person>().Subject;
    person.Id.Should().Be(16);
  }
  [Fact]
  public async Task Persons_Add()
  {
    // Arrange
    var controller = new PersonsController(new PersonService());
    var newPerson = new Person
    {
      FirstName = "John",
      LastName = "Doe",
      Age = 50,
      Title = "FooBar",
      Email = "john.doe@foo.bar"
    };

    // Act
    var result = await controller.Post(newPerson);

    // Assert
    var okResult = result.Should().BeOfType<CreatedAtActionResult>().Subject;
    var person = okResult.Value.Should().BeAssignableTo<Person>().Subject;
    person.Id.Should().Be(51);
  }

  [Fact]
  public async Task Persons_Change()
  {
    // Arrange
    var service = new PersonService();
    var controller = new PersonsController(service);
    var newPerson = new Person
    {
      FirstName = "John",
      LastName = "Doe",
      Age = 50,
      Title = "FooBar",
      Email = "john.doe@foo.bar"
    };

    // Act
    var result = await controller.Put(20, newPerson);

    // Assert
    var okResult = result.Should().BeOfType<NoContentResult>().Subject;

    var person = service.Get(20);
    person.Id.Should().Be(20);
    person.FirstName.Should().Be("John");
    person.LastName.Should().Be("Doe");
    person.Age.Should().Be(50);
    person.Title.Should().Be("FooBar");
    person.Email.Should().Be("john.doe@foo.bar");
  }

  [Fact]
  public async Task Persons_Delete()
  {
    // Arrange
    var service = new PersonService();
    var controller = new PersonsController(service);

    // Act
    var result = await controller.Delete(20);

    // Assert
    var okResult = result.Should().BeOfType<NoContentResult>().Subject;

    // should throw an eception, 
    // because the person with id==20 doesn't exist enymore
    AssertionExtensions.ShouldThrow<InvalidOperationException>(
      () => service.Get(20));
  }
}

This snippets also shows the benefits of FluentAssertions. I really like the readability of this fluent API.

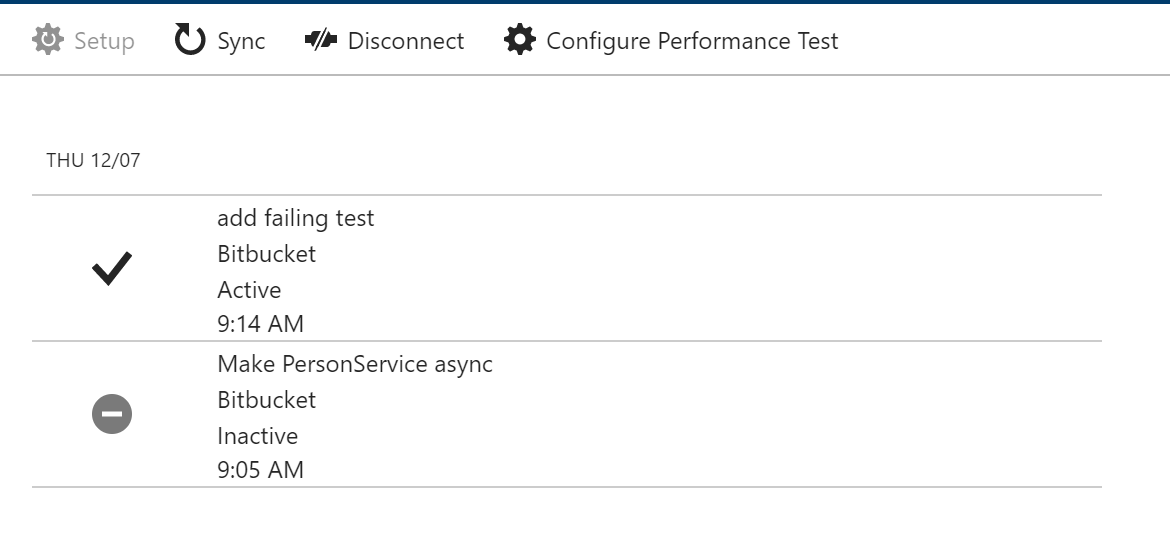
BTW: Enabling live unit testing in Visual Studio 2017 is impressive:

With this unit test approach the invalid ModelState isn't tested. To get this tested we need to test more integrated. Also the ModelBinder should be executed, to validate the input and to set the ModelState

One last thing about unit test: I mentioned Moq before, because I propose to isolate the code to test. This means, wouldn't use a real service, when I test a controller. I also wouldn't use a real repository, when I test a service. And so on... That's why you should work with fake services instead of real ones. Moq is a tool to create such fake objects and to set them up:

[Fact]
public async Task Persons_Get_From_Moq()
{
  // Arrange
  var serviceMock = new Mock<IPersonService>();
  serviceMock.Setup(x => x.GetAll()).Returns(() => new List<Person>
  {
    new Person{Id=1, FirstName="Foo", LastName="Bar"},
    new Person{Id=2, FirstName="John", LastName="Doe"},
    new Person{Id=3, FirstName="Juergen", LastName="Gutsch"},
  });
  var controller = new PersonsController(serviceMock.Object);

  // Act
  var result = await controller.Get();

  // Assert
  var okResult = result.Should().BeOfType<OkObjectResult>().Subject;
  var persons = okResult.Value.Should().BeAssignableTo<IEnumerable<Person>>().Subject;

  persons.Count().Should().Be(3);
}

To learn more about Moq, have a look into the repository: https://github.com/moq/moq4

Integration testing the Controller

But let's start with the simple cases, by testing the GET methods first. To test the integration of a web API or any other web based API, you need to have a web server running. Even in this case a web server is needed, but fortunately there is a test server which can be used. With this host it is not needed to set-up a separate web server on the test machine:

public class PersonsControllerIntegrationTests
{
  private readonly TestServer _server;
  private readonly HttpClient _client;

  public PersonsControllerIntegrationTests()
  {
    // Arrange
    _server = new TestServer(new WebHostBuilder()
                             .UseStartup<Startup>());
    _client = _server.CreateClient();
  }
  // ... 
}

At first, the TestServer will be set up. This guy gets the WebHostBuilder - known from every ASP.NET Core 2.0 application - and uses the Startup of our project to test. At second, we are able to create a HttpClient out of that server. We'll use this HttpClient in the tests to create request to the server and to receive the responses.

[Fact]
public async Task Persons_Get_All()
{
  // Act
  var response = await _client.GetAsync("/api/Persons");
  response.EnsureSuccessStatusCode();
  var responseString = await response.Content.ReadAsStringAsync();

  // Assert
  var persons = JsonConvert.DeserializeObject<IEnumerable<Person>>(responseString);
  persons.Count().Should().Be(50);
}

[Fact]
public async Task Persons_Get_Specific()
{
  // Act
  var response = await _client.GetAsync("/api/Persons/16");
  response.EnsureSuccessStatusCode();
  var responseString = await response.Content.ReadAsStringAsync();

  // Assert
  var person = JsonConvert.DeserializeObject<Person>(responseString);
  person.Id.Should().Be(16);
}

Now let's test the POST request:

[Fact]
public async Task Persons_Post_Specific()
{
  // Arrange
  var personToAdd = new Person
  {
    FirstName = "John",
    LastName = "Doe",
    Age = 50,
    Title = "FooBar",
    Phone = "001 123 1234567",
    Email = "john.doe@foo.bar"
  };
  var content = JsonConvert.SerializeObject(personToAdd);
  var stringContent = new StringContent(content, Encoding.UTF8, "application/json");

  // Act
  var response = await _client.PostAsync("/api/Persons", stringContent);

  // Assert
  response.EnsureSuccessStatusCode();
  var responseString = await response.Content.ReadAsStringAsync();
  var person = JsonConvert.DeserializeObject<Person>(responseString);
  person.Id.Should().Be(51);
}

We need to prepare a little bit more. Here we create a StringContent object, which derives from HttpContent. This will contain the Person we want to add as JSON string. This get's sent via post to the TestServer.

To test the invalid ModelState, just remove a required field or pass a wrong formatted email address or telephone number and test against it. In this sample, I test against three missing required fields:

[Fact]
public async Task Persons_Post_Specific_Invalid()
{
  // Arrange
  var personToAdd = new Person { FirstName = "John" };
  var content = JsonConvert.SerializeObject(personToAdd);
  var stringContent = new StringContent(content, Encoding.UTF8, "application/json");

  // Act
  var response = await _client.PostAsync("/api/Persons", stringContent);

  // Assert
  response.StatusCode.Should().Be(System.Net.HttpStatusCode.BadRequest);
  var responseString = await response.Content.ReadAsStringAsync();
  responseString.Should().Contain("The Email field is required")
    .And.Contain("The LastName field is required")
    .And.Contain("The Phone field is required");
}

This is almost the same pattern for the PUT and the DELETE requests:

[Fact]
public async Task Persons_Put_Specific()
{
  // Arrange
  var personToChange = new Person
  {
    Id = 16,
    FirstName = "John",
    LastName = "Doe",
    Age = 50,
    Title = "FooBar",
    Phone = "001 123 1234567",
    Email = "john.doe@foo.bar"
  };
  var content = JsonConvert.SerializeObject(personToChange);
  var stringContent = new StringContent(content, Encoding.UTF8, "application/json");

  // Act
  var response = await _client.PutAsync("/api/Persons/16", stringContent);

  // Assert
  response.EnsureSuccessStatusCode();
  var responseString = await response.Content.ReadAsStringAsync();
  responseString.Should().Be(String.Empty);
}

[Fact]
public async Task Persons_Put_Specific_Invalid()
{
  // Arrange
  var personToChange = new Person { FirstName = "John" };
  var content = JsonConvert.SerializeObject(personToChange);
  var stringContent = new StringContent(content, Encoding.UTF8, "application/json");

  // Act
  var response = await _client.PutAsync("/api/Persons/16", stringContent);

  // Assert
  response.StatusCode.Should().Be(System.Net.HttpStatusCode.BadRequest);
  var responseString = await response.Content.ReadAsStringAsync();
  responseString.Should().Contain("The Email field is required")
    .And.Contain("The LastName field is required")
    .And.Contain("The Phone field is required");
}

[Fact]
public async Task Persons_Delete_Specific()
{
  // Arrange

  // Act
  var response = await _client.DeleteAsync("/api/Persons/16");

  // Assert
  response.EnsureSuccessStatusCode();
  var responseString = await response.Content.ReadAsStringAsync();
  responseString.Should().Be(String.Empty);
}

Conclusion

That's it.

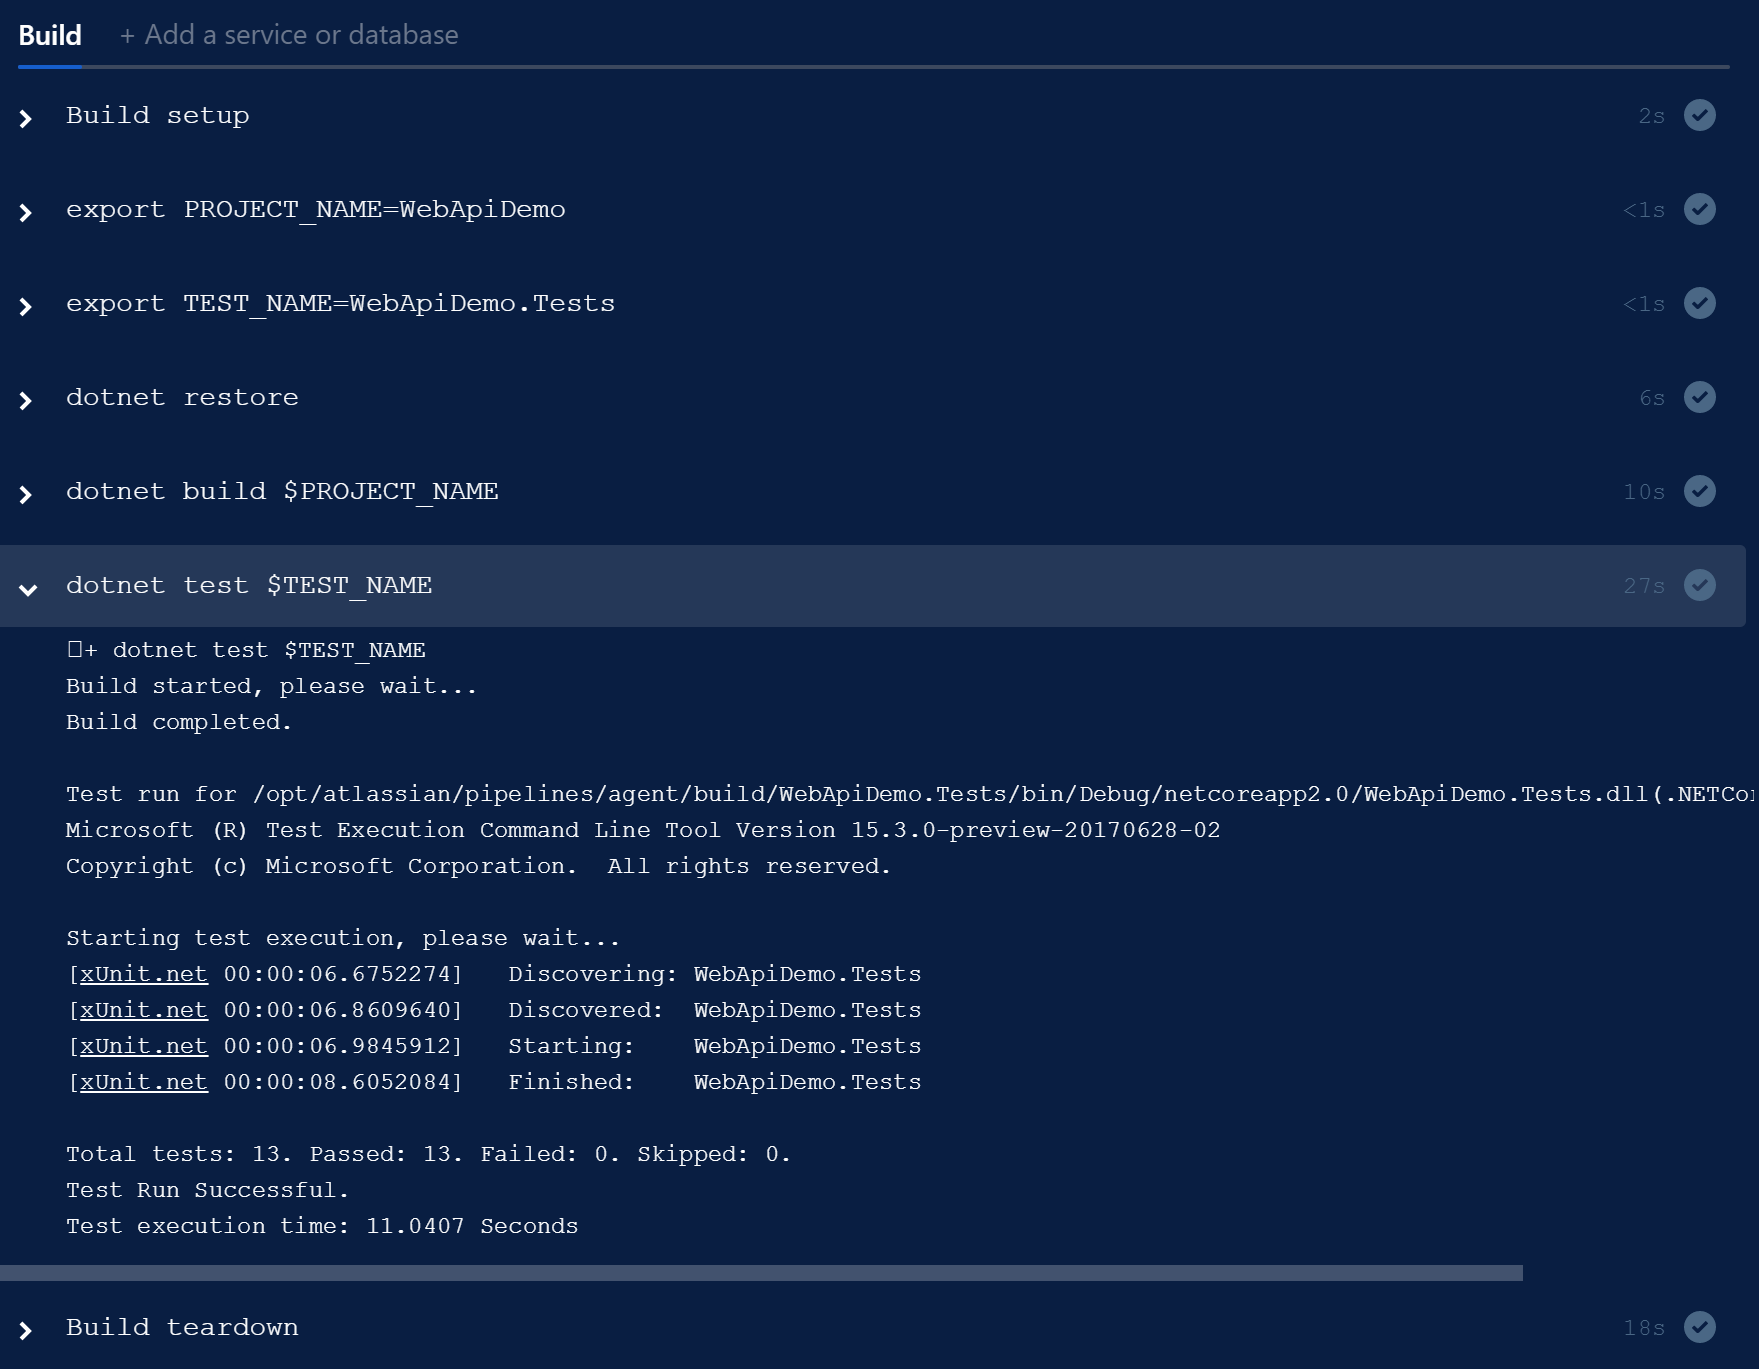
Thanks to the TestServer! With this it is really easy to write integration tests the controllers. Sure, it is still a little more effort than the much simpler unit tests, but you don't have external dependencies anymore. No external web server to manage. No external web server, which is out of control.

Try it out and tell me about your opinion :)

.NET Core 2.0 and ASP.NET 2.0 Core are here and ready to use

$
0
0

Recently I did a overview talk about .NET Core, .NET Standard and ASP.NET Core at the Azure Meetup Freiburg. I told them about .NET Core 2.0, showed the dotnet CLI and the integration in Visual Studio. Explained the sense of .NET Standard and why developers should take care about it. I also showed them ASP.NET Core, how it works, how to host and explained the main differences to the ASP.NET 4.x versions.

BTW: This Meetup was really great. Well organized on a pretty nice and modern location. It was really fun to talk there. Thanks to Christian, Patrick and Nadine to organize this event :-)

After that talk they asked me some pretty interesting and important questions:

Question 1: "Should we start using ASP.NET Core and .NET Core?"

My answer is a pretty clear YES.

  • Use .NET Standard for your libraries, if you don't have dependencies to platform specific APIs (eg. Registry, drivers, etc.) even if you don't need to be x-plat. Why? Because it just works and you'll keep a door open to share your library to other platforms later on. Since .NET Standard 2.0 you are not really limited, you are able to do almost all with C# you can do with the full .NET Framework
  • Use ASP.NET Core for new web projects, if you don't need to do Web Forms. Because it is fast, lightweight and x-plat. Thanks to .NET standard you are able to reuse your older .NET Framework libraries, if you need to.
  • Use ASP.NET Core to use the new modern MVC framework with the tag helpers or the new lightweight razor pages
  • Use ASP.NET Core to host your application on various cloud providers. Not only on Azure, but also on Amazon and Google:
    • http://docs.aws.amazon.com/elasticbeanstalk/latest/dg/dotnet-core-tutorial.html
    • https://aws.amazon.com/blogs/developer/running-serverless-asp-net-core-web-apis-with-amazon-lambda/
    • https://codelabs.developers.google.com/codelabs/cloud-app-engine-aspnetcore/#0
    • https://codelabs.developers.google.com/codelabs/cloud-aspnetcore-cloudshell/#0
  • Use ASP.NET Core to write lightweight and fast Web API services running either self hosted, in Docker or on Linux, Mac or Windows
  • Use ASP.NET Core to create lightweight back-ends for Angular or React based SPA applications.
  • Use .NET Core to write tools for different platforms

As an library developer, there is almost no reason to not use the .NET Standard. Since .NET Standard 2.0 the full API of the .NET Framework is available and can be used to write libraries for .NET Core, Xamarin, UWP and the full .NET Framework. It also supports to reference full .NET Framework assemblies.

The .NET Standard is an API specification that need to be implemented by the platform specific Frameworks. The .NET Framework 4.6.2, .NET Core 2.0 and Xamarin are implementing the .NET Standard 2.0, which means they all uses the same API (namespaces names, class names, method names). Writing libraries against the .NET Standard 2.0 API will run on .NET Framework 2.0, on .NET Core 2.0, as well as on Xamarin and on every other platform specific Framework that supports that API.

Question 2: Do we need to migrate our existing web applications to ASP.NET Core?

My answer is: NO. You don't need to and I would propose to not do it if there's no good reason to do it.

There are a lot blog posts out there about migrating web applications to ASP.NET Core, but you don't need to, if you don't face any problems with your existing one. There are just a few reasons to migrate:

  • You want to go x-plat to host on Linux
  • You want to host on small devices
  • You want to host in linux based Docker containers
  • You want to use a faster framework
    • A faster framework is useless, if your code or your dependencies are slow ;-)
  • You want to use a modern framework
    • Note: ASP.NET 4.x is not outdated, still supported and still gets new features
  • You want to run your web on a Microsoft Nano Server

Depending on the level of customizing you did in your existing application, the migration could be a lot of effort. Someone needs to pay for the effort, that's why I would propose not to migrate to ASP.NET Core, if you don't have any problems or a real need to do it.

Conclusion

I would use ASP.NET Core for every new web project and .NET Standard for every library I need to write. Because it is almost mature and really usable since the versions 2.0. You can do almost all the stuff, you can do with the full .NET framework.

BTW: Rick Strahl also just wrote an article about that. Please read it. It's great, as almost all of his posts:https://weblog.west-wind.com/posts/2017/Oct/22/NET-Core-20-and-ASPNET-20-Core-are-finally-here

BTW: The slides off that talk are on SlideShare. If you want me to do that talk in your meetup or in your user group, just ping me on twitter or drop me an email


GraphiQL for ASP.​NET Core

$
0
0

One nice thing about blogging is the feedback from the readers. I got some nice kudos, but also great new ideas. One idea was born out of a question about a "graphi" UI for the GraphQL Middleware I wrote some months ago. I never heard about "graphi", which actually is "GraphiQL", a generic HTML UI over a GraphQL endpoint. It seemed to be something like a Swagger UI, but just for GraphQL. That sounds nice and I did some research about that.

What is GraphiQL?

Actually it is absolutely not the same as Swagger and not as detailed as Swagger, but it provides a simple and easy to use UI to play around with your GraphQL end-point. So you cannot really compare it.

GraphiQL is a React component provided by the GraphQL creators, that can be used in your project. It basically provides an input area to write some GraphQL queries and a button to sent that query to your GrapgQL end-point. You'll than see the result or the error on the right side of the UI.

Additionally it provides some more nice features:

  • A history of sent queries, which appears on the left side, if you press the history-button. To reuse previously used queries.
  • It rewrites the URL to support linking to a specific query. It stores the query and the variables in the URL, to sent it to someone else, or to bookmark the query to test.
  • It actually creates a documentation out of the GraphQL end-point. By clicking at the "Docks" link it opens a documentation about the types used in this API. This is really magic, because it shows the documentation of a type I never requested:

Implementing GraphiQL

The first idea was to write something like this by my own. But it should be the same as the existing GraphiQL UI. Why not using the existing implementation? Thanks to Steve Sanderson, we have the Node Services for ASP.NET Core. Why not running the existing GraphiQL implementation in a Middleware using the NodeServices?

I tried it with the "apollo-server-module-graphiql" package. I called this small JavaScript to render the graphiql UI and return it back to C# via the NodeSerices:

var graphiql = require('apollo-server-module-graphiql');

module.exports = function (callback, options) {
    var data = {
        endpointURL: options.graphQlEndpoint
    };

    var result = graphiql.renderGraphiQL(data);
    callback(null, result);
};

The usage of that script inside the Middleware looks like this:

var file = _env.WebRootFileProvider.GetFileInfo("graphiql.js");
var result = await _nodeServices.InvokeAsync<string>(file.PhysicalPath, _options);
await httpCont

That works great, but has one problem. It wraps the GraphQL query in a JSON-Object that was posted to the GraphQL end-point. I would need to change the GraphQlMiddleware implementation, because of that. The current implementation expects the plain GraphQL query in the POST body.

What is the most useful approach? Wrapping the GraphQL query in a JSON object or sending the plain query? Any Ideas? What do you use? Please tell me by dropping a comment.

With this approach I'm pretty much dependent to the Apollo developers and need to change my implementation, whenever they change their implementations.

This is why I decided to use the same concept of generating the UI as the "apollo-server-module-graphiql" package but implemented in C#. This unfortunately doesn't need the NodeServices anymore.

I use exact the same generated code as this Node module, but changed the way the query is send to the server. Now the plain query will be sent to the server.

I started playing around with this and added it to the existing project, mentioned here: GraphQL end-point Middleware for ASP.NET Core.

Using the GraphiqlMiddleware

The result is as easy to use as the GraphQlMiddleware. Let's see how it looks to add the Middlewares:

if (env.IsDevelopment())
{
    app.UseDeveloperExceptionPage();
	// adding the GraphiQL UI
    app.UseGraphiql(options =>
    {
        options.GraphiqlPath = "/graphiql"; // default
        options.GraphQlEndpoint = "/graph"; // default
    });
}
// adding the GraphQL end point
app.UseGraphQl(options =>
{
    options.GraphApiUrl = "/graph"; // default
    options.RootGraphType = new BooksQuery(bookRepository);
    options.FormatOutput = true; // default: false
});

As you can see the second Middleware is bound to the first one by using the same path "/graph". I didn't create any hidden dependency between the both Middlewares, to make it ease to use it in various combinations. Maybe you want to use the GraphiQL UI only in the Development or Staging environment as shown in this example.

Now start the web using Visual Studio (press [F5]). The web starts with the default view or API. Add "graphiql" to the URL in the browsers address bar and see what happens. You should see a generated UI for your GraphQL endpoint, where you can now start playing around with our API, testing and debugging it with your current data. (See the screenshots on top.)

I'll create a separate NuGet package for the GraphiqlMiddleware. This will not have the GraphQlMiddleware as a dependency and could be used completely separate.

Conclusion

This was a lot easier to implement than expected. Currently there is still some refactoring needed:

  • I don't like to have the HMTL and JavaScript code in the C#. I'd like to load that from an embedded resource file, which actually is a HTML file.
  • I should add some more configuration options. E.g. to change the theme, as equal to the original Node implementation, to preload queries and results, etc.
  • Find a way to use it offline as well. Currently there's a connection to the internet needed to load the CSS and JavaScripts from the CDNs.

You wanna try it? Download, clone or fork the sources on GitHub.

What do you think about that? Could this be useful to you? Please leave a comment and tell me about your opinion.

Update [10/26/2017 21:03]

GraphiQL is much more powerful than expected. I was wondering how the GraphQL create IntelliSense support in the editor and how it creates the documentation. I had a deeper look into the traffic and found two more cool things about it:

First: GraphiQL sends a special query to the GraphQL to request for the GraphQL specific documentation. IN this case it looks like this:

  query IntrospectionQuery {
    __schema {
      queryType { name }
      mutationType { name }
      subscriptionType { name }
      types {
        ...FullType
      }
      directives {
        name
        description
        locations
        args {
          ...InputValue
        }
      }
    }
  }

  fragment FullType on __Type {
    kind
    name
    description
    fields(includeDeprecated: true) {
      name
      description
      args {
        ...InputValue
      }
      type {
        ...TypeRef
      }
      isDeprecated
      deprecationReason
    }
    inputFields {
      ...InputValue
    }
    interfaces {
      ...TypeRef
    }
    enumValues(includeDeprecated: true) {
      name
      description
      isDeprecated
      deprecationReason
    }
    possibleTypes {
      ...TypeRef
    }
  }

  fragment InputValue on __InputValue {
    name
    description
    type { ...TypeRef }
    defaultValue
  }

  fragment TypeRef on __Type {
    kind
    name
    ofType {
      kind
      name
      ofType {
        kind
        name
        ofType {
          kind
          name
          ofType {
            kind
            name
            ofType {
              kind
              name
              ofType {
                kind
                name
                ofType {
                  kind
                  name
                }
              }
            }
          }
        }
      }
    }
  }

Try this query and sent it to your GraphQL API using Postman or a similar tool and see what happens :)

Second:GraphQL for .NET knows how to answer that query and sent the full documentation about my data structure to the client like this:

{"data": {"__schema": {"queryType": {"name": "BooksQuery"
            },"mutationType": null,"subscriptionType": null,"types": [
                {"kind": "SCALAR","name": "String","description": null,"fields": null,"inputFields": null,"interfaces": null,"enumValues": null,"possibleTypes": null
                },
                {"kind": "SCALAR","name": "Boolean","description": null,"fields": null,"inputFields": null,"interfaces": null,"enumValues": null,"possibleTypes": null
                },
                {"kind": "SCALAR","name": "Float","description": null,"fields": null,"inputFields": null,"interfaces": null,"enumValues": null,"possibleTypes": null
                },
                {"kind": "SCALAR","name": "Int","description": null,"fields": null,"inputFields": null,"interfaces": null,"enumValues": null,"possibleTypes": null
                },
                {"kind": "SCALAR","name": "ID","description": null,"fields": null,"inputFields": null,"interfaces": null,"enumValues": null,"possibleTypes": null
                },
                {"kind": "SCALAR","name": "Date","description": "The `Date` scalar type represents a timestamp provided in UTC. `Date` expects timestamps to be formatted in accordance with the [ISO-8601](https://en.wikipedia.org/wiki/ISO_8601) standard.","fields": null,"inputFields": null,"interfaces": null,"enumValues": null,"possibleTypes": null
                },
                {"kind": "SCALAR","name": "Decimal","description": null,"fields": null,"inputFields": null,"interfaces": null,"enumValues": null,"possibleTypes": null
                },
              	[ . . . ]
                // many more documentation from the server
        }
    }
}

This is really awesome. With GraphiQL I got a lot more stuff than expected. And it didn't take more than 5 hours to implement this middleware.

NuGet, Cache and some more problems

$
0
0

Recently I had some problems using NuGet, two of them were huge, which took me a while to solve them. But all of them are easy to fix, if you know how to do it.

NuGet Cache

The fist and more critical problem was related to the NuGet Cache in .NET Core projects. It seems the underlying problem was a broken package in the cache. I didn't find out the real reason. Anyway, every time I tried to restore or add packages, I got an error message, that told me about an error at the first character in the project.assets.json. Yes, there is still a kind of a project.json even in .NET Core 2.0 projects. This file is in the "obj" folder of a .NET Core project and stores all information about the NuGet packages.

This error looked like a typical encoding error. This happens often if you try to read a ANSI encoded file, from a UTF-8 encoded file, or vice versa. But the project.assets.json was absolutely fine. It seemed to be a problem with one of the packages. It worked with the predefined .NET Core or ASP.NET Core packages, but it doesn't with any other. I wasn't able anymore to work on any .NET Core projects that targets .NET Core, but it worked with projects that are targeting the full .NET Framework.

I couldn't solve the real problem and I didn't really want to go threw all of the packages to find the broken one. The .NET CLI provides a nice tool to manage the NuGet Cache. It provides a more detailed CLI to NuGet.

dotnet nuget --help

This shows you tree different commands to work with NuGet. delete and push are working on the remote server to delete a package from a server or to push a new package to the server using the NuGet API. The third one is a command to work with local resources:

dotnet nuget locals --help

This command shows you the help about the locals command. Try the next one to get a list of local NuGet resources:

dotnet nuget locals all --list

You can now use the clear option to clear all caches:

dotnet nuget locals all --clear

Or a specific one by naming it:

dotnet nuget locals http-cache --clear

This is much more easier than searching for all the different cache locations and to delete them manually.

This solved my problem. The broken package was gone from all the caches and I was able to load the new, clean and healthy ones from NuGet.

Versions numbers in packages folders

The second huge problem is not related to .NET Core, but to classic .NET Framework projects using NuGet. If you also use Git-Flow to manage your source code, you'll have at least to different main branches: Master and Develop. Both branches contain different versions. Master contains the current version code and Develop contains the next version code. It is also possible that both versions use different versions of dependent NuGet packages. And here is the Problem:

Master used e. g. AwesomePackage 1.2.0 and Develop uses AwesomePackage 1.3.0-beta-build54321

Both versions of the code are referencing to the AwesomeLib.dll but in different locations:

  • Master: /packages/awesomepackage 1.2.0/lib/net4.6/AwesomeLib.dll
  • Develop: /packages/awesomepackage 1.3.0-beta-build54321/lib/net4.6/AwesomeLib.dll

If you now release the Develop to Master, you'll definitely forget to go to all the projects to change the reference paths, don't you? The build of master will fail, because this specific beta folder wont exist on the server, or even more bad: The build will not fail because the folder of the old package still exists on the build server, because you didn't clear the build work space. This will result in runtime errors. This problem will probably happen more likely, if you provide your own packages using your own NuGet Server.

I solved this by using a different NuGet client than NuGet. I use Paket, because it doesn't store the binaries in version specific folder and the reference path will be the same as long as the package name doesn't change. Using Paket I don't need to take care about reference paths and every branch loads the dependencies from the same location.

Paket officially supports the NuGet APIs and is mentioned on NuGet org, in the package details.

To learn more about Paket visit the official documentation: https://fsprojects.github.io/Paket/

Conclusion

Being an agile developer, doesn't only mean to follow an iterative process. It also means to use the best tools you can buy. But you don't always need to buy the best tools. Many of them are open source and free to use. Just help them by donating some bugs, spread the word, file some issues or contribute in a way to improve the tool. Paket is one of such tools, lightweight, fast, easy to use and it solves many problems. It is also well supported in CAKE , which is the build DSL I use to build, test and deploy applications.

Trying BitBucket Pipelines with ASP.NET Core

$
0
0

BitBucket provides a continuous integration tool called Pipelines. This is based on Docker containers which are running on a Linux based Docker machine. Within this post I wanna try to use BitBucket Pipelines with an ASP.NET Core application.

In the past I preferred BitBucket over GitHub, because I used Mercurial more than Git. But that changed five years ago. Since than I use GitHub for almost every new personal project that doesn't need to be a private project. But at the YooApps we use the entire Atlassian ALM Stack including Jira, Confluence and BitBucket. (We don't use Bamboo yet, because we also use Azure a lot and we didn't get Bamboo running on Azure). BitBucket is a good choice, if you anyway use the other Atlassian tools, because the integration to Jira and Confluence is awesome.

Since a while, Atlassian provides Pipelines as a simple continuous integration tool directly on BitBucket. You don't need to setup Bamboo to build and test just a simple application. At the YooApps we actually use Pipelines in various projects which are not using .NET. For .NET Projects we are currently using CAKE or FAKE on Jenkins, hosted on an Azure VM.

Pipelines can also used to build and test branches and pull request, which is awesome. So why shouldn't we use Pipelines for .NET Core based projects? BitBucket actually provides an already prepared Pipelines configuration for .NET Core related projects, using the microsoft/dotnet Docker image. So let's try pipelines.

The project to build

As usual, I just setup a simple ASP.NET Core project and add a XUnit test project to it. In this case I use the same project as shown in the Unit testing ASP.NET Core post. I imported that project from GitHub to BitBucket. if you also wanna try Pipelines, feel free to use the same way or just download my solution and commit it into your repository on BitBucket. Once the sources are in the repository, you can start to setup Pipelines.

Setup Pipelines

Setting up Pipelines actually is pretty easy. In your repository on BitBucket.com is a menu item called Pipelines. After pressing it you'll see the setup page, where you are able to select a technology specific configuration. .NET Core is not the first choice for BitBucket, because the .NET Core configuration is placed under "More". It is available anyway, which is really nice. After selecting the configuration type, you'll see the configuration in an editor inside the browser. It is actually a YAML configuration, called bitbucket-pipelines.yml, which is pretty easy to read. This configuration is prepared to use the microsoft/dotnet:onbuild Docker image and it already has the most common .NET CLI commands prepared, that will be used with that ASP.NET Core projects. You just need to configure the projects names for the build and test commands.

The completed configuration for my current project looks like this:

# This is a sample build configuration for .NET Core.
# Check our guides at https://confluence.atlassian.com/x/5Q4SMw for more examples.
# Only use spaces to indent your .yml configuration.
# -----
# You can specify a custom docker image from Docker Hub as your build environment.
image: microsoft/dotnet:onbuild

pipelines:
  default:
    - step:
        caches:
          - dotnetcore
        script: # Modify the commands below to build your repository.
          - export PROJECT_NAME=WebApiDemo
          - export TEST_NAME=WebApiDemo.Tests
          - dotnet restore
          - dotnet build $PROJECT_NAME
          - dotnet test $TEST_NAME

If you don't have tests yet, comment the last line out by adding a #-sign in front of that line.

After pressing "Commit file", this configuration file gets stored in the root of your repository, which makes it available for all the developers of that project.

Let's try it

After that config was saved, the build started immediately... and failed!

Why? Because that Docker image was pretty much outdated. It contains an older version with an SDK that still uses the the project.json for .NET Core projects.

Changing the name of the Docker image from microsoft/dotnet:onbuild to microsoft/dotnet:sdk helps. You now need to change the bitbucket-pipelines.yml in your local Git workspace or using the editor on BitBucket directly. After committing the changes, again the build starts immediately and is green now

Even the tests are passed. As expected, I got a pretty detailed output about every step configured in the "script" node of the bitbucket-pipelines.yml

You don't need to know how to configure Docker using the pipelines. This is awesome.

Let's try the PR build

To create a PR, I need to create a feature branch first. I created it locally using the name "feature/build-test" and pushed that branch to the origin. You now can see that this branch got built by Pipelines:

Now let's create the PR using the BitBucket web UI. It automatically assigns my latest feature branch and the main branch, which is develop in my case:

Here we see that both branches are successfully built and tested previously. After pressing save we see the build state in the PRs overview:

This is actually not a specific built for that PR, but the build of the feature branch. So in this case, it doesn't really build the PR. (Maybe it does, if the PR comes from a fork and the branch wasn't tested previously. I didn't test it yet.)

After merging that PR back to the develop (in that case), we will see that this merge commit was successfully built too:

We have four builds done here: The failing one, the one 11 hours ago and two builds 52 minutes ago in two different branches.

The Continuous Deployment pipeline

With this, I would be save to trigger a direct deployment on every successful build of the main branches. As you maybe know, it is super simple to deploy a web application to an Azure web app, by connecting it directly to any Git repository. Usually this is pretty dangerous, if you don't have any builds and tests before you deploy the code. But in this case, we are sure the PRs and the branches are building and testing successfully.

We just need to ensure that the deployment is only be triggered, if the build is successfully done. Does this work with Pipelines? I'm pretty curious. Let's try it.

To do that, I created a new Web App on Azure and connect this app to the Git repository on BitBucket. I'll now add a failing test and commit it to the Git repository. What now should happen is, that the build starts before the code gets pushed to Azure and the failing build should disable the push to Azure.

I'm skeptical whether this is working or not. We will see.

The Azure Web App is created and running on http://build-with-bitbucket-pipelines.azurewebsites.net/. The deployment is configured to listen on the develop branch. That means, every time we push changes to that branch, the deployment to Azure will start.

I'll now create a new feature branch called "feature/failing-test" and push it to the BitBucket. I don't follow the same steps as described in the previous section about the PRs, to keep the test simple. I merge the feature branch directly and without an PR to develop and push all the changes to BitBucket. Yes, I'm a rebel... ;-)

The build starts immediately and fails as expected:

But what about the deployment? Let's have a look at the deployments on Azure. We should only see the initial successful deployment. Unfortunately there is another successful deployment with the same commit message as the failing build on BitBucket:

This is bad. We now have an unstable application running on azure. Unfortunately there is no option on BitBucket to trigger the WebHook on a successful build. We are able trigger the Hook on a build state change, but it is not possible to define on what state we want to trigger the build.

Too bad, this doesn't seem to be the right way to configure the continuous deployment pipeline in the same easy way than the continuous integration process. Sure there are many other, but more complex ways to do that.

Update 12/8/2017

There is anyway a simple option to setup an deployment after successful build. This could be done by triggering the Azure webhook inside the Pipelines. An sample bash script to do that can be found here: https://bitbucket.org/mojall/bitbucket-pipelines-deploy-to-azure/ Without the comments it looks like this:

curl -X POST "https://\$$SITE_NAME:$FTP_PASSWORD@$SITE_NAME.scm.azurewebsites.net/deploy" \
  --header "Content-Type: application/json" \
  --header "Accept: application/json" \
  --header "X-SITE-DEPLOYMENT-ID: $SITE_NAME" \
  --header "Transfer-encoding: chunked" \
  --data "{\"format\":\"basic\", \"url\":\"https://$BITBUCKET_USERNAME:$BITBUCKET_PASSWORD@bitbucket.org/$BITBUCKET_USERNAME/$REPOSITORY_NAME.git\"}"

echo Finished uploading files to site $SITE_NAME.

I now need to set the environment variables in the Pipelines configuration:

Be sure to check the "Secured" checkbox for every password variable, to hide the password in this UI and in the log output of Pipelines.

And we need to add two script commands to the bitbucket-pipelines.yml:

- chmod +x ./deploy-to-azure.bash
- ./deploy-to-azure.bash

The last step is to remove the Azure web hook from the web hook configuration in BitBucket and to remove the failing test. After pushing the changes to BitBucket the build and the first successfull deployment starts immediately.

I now add the failing test again to test the failing deployment again and it worked as expected. The test fails and the next commands don't get executed. The web hook will never triggered and the unstable app will not be deployed.

Now there is a failing build on Pipelines:

(See the commit messages)

And that failing commit is not deployed to azure:

The Continuous Deployment is successfully done.

Conclusion

Isn't it super easy to setup a continuous integration? ~~Unfortunately we are not able to complete the deployment using this.~~ But anyway, we now have a build on any branch and on any pull-request. That helps a lot.

Pros:

  • (+++) super easy to setup
  • (++) almost fully integrated
  • (+++) flexibility based on Docker

Cons:

  • (--) runs only on Linux. I would love to see windows containers working
  • (---) not fully integrated into web hooks. "trigger on successful build state" is missing for the hooks

I would like to have something like this on GitHub too. The usage is almost similar to AppVeyor, but pretty much simpler to configure, less complex and it just works. The reason is Docker, I think. For sure, AppVeyor can do a lot more stuff and couldn't really compared to Pipelines. Anyway, I will do compare it to AppVeyor and will do the same with it in one of the next posts.

Currently there is a big downside with BitBucket Pipelines: Currently this is only working with Docker images that are running on Linux. It is not yet possible to use it for full .NET Framework projects. This is the reason why we never used it at the YooApps for .NET Projects. I'm sure we need to think about doing more projects using .NET Core ;-)

Book Review: ASP.​NET Core 2 and Angular 5

$
0
0

Last fall, I did my first technical review of a book written by Valerio De Sanctis, called ASP.NET Core 2 and Angular 5. This book is about to use Visual Studio 2017 to create a Single Page Application using ASP.NET Core and Angular.

About this book

The full title is "ASP.NET Core 2 and Angular 5: Full-Stack Web Development with .NET Core and Angular" and was published by PacktPub and also available on Amazon. It is available as a printed version and via various e-book formats.

This book doesn't cover both technologies in deep, but gives you a good introduction on how both technologies are working together. It leads you step by step from the initial setup to the finished application. Don't expect a book for expert developers. But this book is great for ASP.NET Developers who want to start with ASP.NET Core and Angular. This book is a step by step tutorial to create all parts of an Application that manages tests, its questions, answers and results. It describes the database as well as the Web APIs, the Angular parts and the HTML, the authentication and finally the deployment to a web server.

Valerio uses the Angular based SPA project , which is available in Visual Studio 2017 and the .NET Core 2.0 SDK. This project template is not the best solution for bigger projects, but but it fits good for small size projects as described in this book.

About the technical review

It was my first technical review of an entire book. It was kinda fun to do this. I'm pretty sure it was a pretty hard job for Valerio, because the technologies changed while he was working on the chapters. ASP.NET Core 2.0 was released after he finished four or five chapter and he needed to rewrite those chapters. He changed the whole Angular integration into the ASP.NET Project, because of the new Angular SPA project template. Also Angular 5 came out during writing. Fortunately there wasn't so much relevant changes between, version 4 and version 5. In know this issues, about writing good contents, while technology changes. I did a article series for a developer magazine about ASP.NET Core and Angular 2 and both ASP.NET Core and Angular changes many times. And changes again right after I finished the articles. I rewrote that stuff a lot and worked almost six months on only three articles. Even my Angular posts in this blog are pretty much outdated and don't work anymore with the latest versions.

Kudos to Valerio, he really did a great job.

I got one chapter by another to review. My job wasn't just to read the chapters, but also to find logical errors, mistakes that will possibly confuse the readers and also to find not working code parts. I followed the chapters as written by Valerio to build this sample application. I followed all instructions and samples to find errors. I reported a lot of errors, I think. And I'm sure that all of them where removed. After I finished the review of the last chapter, I also finished the coding and got a running application deployed on a webserver.

Readers reviews on Amazon and PacktPub

I just had a look into the readers reviews on Amazon and PacktPub. There are not so much reviews done currently, but unfortunately there are (currently) 4 out of 9 reviews talking about errors in the code samples. Mostly about errors in the client side Angular code. This is a lot IMHO. This turns me sadly. And I really apologize that. I was pretty sure I found almost all mistakes, maybe at least those errors that prevents a running application. Because I got it running at the end. Additionally I wasn't the only technical review. There was Ramchandra Vellanki who also did a great job, for sure.

What happened that some readers found errors? Two reasons I thought about first:

  1. The readers didn't follow the instructions really carefully. Especially experienced developers really know how it works or how it should work in their perspective. They don't read exactly, because they seem to know where the way goes. I did so as well during the first three or four chapters and I needed to start again from the beginning.
  2. Dependencies were changing since the book was published. Especially if the package versions inside the package.json were not fixed to a specific version. npm install then loads the latest version, which may contain breaking changes. The package.json in the book has fixed version, but the sources on GitHub doesn't.

I'm pretty sure there are some errors left in the codes, but at the end the application should run.

Also there are conceptual differences. While writing about Angular and ASP.NET Core and while working with it, I learned a lot and from my current point of view, I would not host an Angular app inside an ASP.NET Core application anymore. (Maybe I'll think about doing that in a really small application.) Anyway, there is that ASP.NET Core Angular SPA project and it is really easy to setup a SPA using this. So, why not using this project template to describe the concepts and interaction of Angular and ASP.NET Core? This keeps the book simple and short for beginners.

Conclusion

I would definitely do a technical review again, if needed. As I said, it is fun and an honor to help an author to write a book like this.

Too bad, that some readers struggle about errors anyway and couldn't get the code running. But writing a book is hard work. And we developers all know, that no application is really bug free, so even a book about quickly changing technologies cannot be free of errors.

Trying React the first time

$
0
0

The last two years I worked a lot with Angular. I learned a lot and I also wrote some blog posts about it. While I worked with Angular, I always had React in mind and wanted to learn about that. But I never head the time or a real reason to look at it. I still have no reason to try it, but a little bit of time left. So why not? :-)

This post is just a small overview of what I learned during the setup and in the very first tries.

The Goal

It is not only about developing using React, later I will also see how React works with ASP.NET and ASP.NET Core and how it behaves in Visual Studio. I also want to try the different benefits (compared to Angular) I heard and read about React:

  • It is not a huge framework like Angular but just a library
  • Because It's a library, it should be easy to extend existing web-apps.
  • You should be more free to use different libraries, since there is not all the stuff built in.

Setup

My first ideas was to follow the tutorials on https://reactjs.org/. Using this tutorial some other tools came along and some hidden configuration happened. The worst thing from my perspective is that I need to use a package manager to install another package manager to load the packages. Yarn was installed using NPM and was used. Webpack was installed and used in some way, but there was no configuration, no hint about it. This tutorial uses the create-react-app starter kid. This thing hides many stuff.

Project setup

What I like while working with Angular is a really transparent way of using it and working with it. Because of this I searched for a pretty simple tutorial to setup React in a simple, clean and lightweight way. I found this great tutorial by Robin Wieruch: https://www.robinwieruch.de/minimal-react-Webpack-babel-setup/

This Setup uses NPM to get the packages. It uses Webpack to bundle the needed Javascript, Babel is integrated in to Webpack to transpile the JavaScripts from ES6 to more browser compatible JavaScript.

I also use the Webpack-dev-server to run the React app during development. Also react-hot-loader is used to speed up the development time a little bit. The main difference to Angular development is the usage of ES6 based JavaScript and Babel instead of using Typescript. It should also work with typescript, but it doesn't really seem to matter, because they are pretty similar. I'll try using ES6 to see how it works. The only thing I possibly will miss is the type checking.

As you can see, there is not really a difference to Typescript yet, only the JSX thing takes getting used to:

// index.js
import React from 'react';
import ReactDOM from 'react-dom';

import Layout from './components/Layout';

const app = document.getElementById('app');

ReactDOM.render(<Layout/>, app);

module.hot.accept();

I can also uses classes in JavaScript:

// Layout.js
import React from 'react';
import Header from './Header';
import Footer from './Footer';

export default class Layout extends React.Component {
    render() {
        return (
            <div><Header/><Footer/></div>
        );
    }
}

With this setup, I believe I can easily continue to play around with React.

Visual Studio Code

To support ES6, React and JSX in VSCode I installed some extensions for it:

  • Babel JavaScript by Michael McDermott
    • Syntax-Highlighting for modern JavaScripts
  • ESLint by Dirk Baeumer
    • To lint the modern JavaScripts
  • JavaScript (ES6) code snippets by Charalampos Karypidis
  • Reactjs code snippets by Charalampos Karypidis

Webpack

Webpack is configured to build a bundle.js to thde ./dist folder. This folder is also the root folder for the Webpack dev server. So it will serve all the files from within this folder.

To start building and running the app, there is a start script added to the packages.config

"start": "Webpack-dev-server --progress --colors --config ./Webpack.config.js",

With this I can easily call npm start from a console or from the terminal inside VSCode. The Webpack dev server will rebuild the codes and reload the app in the browser, if a code file changes.

const webpack = require('webpack');

module.exports = {
    entry: [
        'react-hot-loader/patch',
        './src/index.js'
    ],
    module: {
        rules: [{
            test: /\.(js|jsx)$/,
            exclude: /node_modules/,
            use: ['babel-loader']
        }]
    },
    resolve: {
        extensions: ['*', '.js', '.jsx']
    },
    output: {
        path: __dirname + '/dist',
        publicPath: '/',
        filename: 'bundle.js'
    },
    plugins: [
      new webpack.HotModuleReplacementPlugin()
    ],
    devServer: {
      contentBase: './dist',
      hot: true
    }
};

React Developer Tools

For Chrome and Firefox there are add-ins available to inspect and debug React apps in the browser. For Chrome I installed the React Developer Tools, which is really useful to see the component hierarchy:

Hosting the app

The react app is hosted in a index.html, which is stored inside the ./dist folder. It references the bundle.js. The React process starts in the index.js. React putts the App inside a div with the Id app (as you can see in the first code snippet in this post.)

<!DOCTYPE html><html>
  <head>
      <title>The Minimal React Webpack Babel Setup</title>
  </head>
  <body>
    <div id="app"></div>
    <script src="bundle.js"></script>
  </body></html>

The index.js import the Layout.js. Here a basic layout is defined, by adding a Header and a Footer component, which are also imported from other components.

// Header.js
import React from 'react';
import ReactDOM from 'react-dom';

export default class Header extends React.Component {
    constructor(props) {
        super(props);
        this.title = 'Header';
    }
    render() {
        return (
            <header><h1>{this.title}</h1></header>
        );
    }
}
// Footer.js
import React from 'react';
import ReactDOM from 'react-dom';

export default class Footer extends React.Component {
    constructor(props) {
        super(props);
        this.title = 'Footer';
    }
    render() {
        return (
            <footer><h1>{this.title}</h1></footer>
        );
    }
}

The resulting HTML looks like this:

<!DOCTYPE html><html><head><title>The Minimal React Webpack Babel Setup</title></head><body><div id="app"><div><header><h1>Header</h1></header><footer><h1>Footer</h1></footer></div></div><script src="bundle.js"></script></body></html>

Conclusion

My current impression is that React is much more fast on startup than Angular. This is just a kind of a Hello world app, but even for such an app Angular need some time to start a few lines of code. Maybe that changes if the App gets bigger. But I'm sure it keeps to be fast, because of less overhead in the framework.

The setup was easy and works on the first try. The experience in Angular helped a lot here. I already know the tools. Anyway, Robins tutorial is pretty clear, simple and easy to read: https://www.robinwieruch.de/minimal-react-Webpack-babel-setup/

To get started with React, there's also a nice Video series on YouTube, which tells you about the really basics and how to get started creating components and adding the dynamic stuff to the components: https://www.youtube.com/watch?v=MhkGQAoc7bc&list=PLoYCgNOIyGABj2GQSlDRjgvXtqfDxKm5b

Viewing all 759 articles
Browse latest View live